Where to begin with Payroll
It can be a challenge to determine the appropriate starting point when you begin working to setup something new. This document will outline the general guidelines and recommendations on where to start when working with payroll in VisionCore.
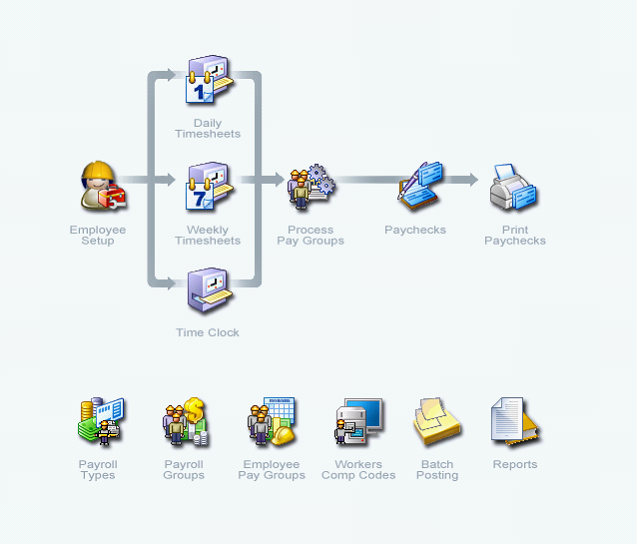
You must complete the following items prior to setting up payroll.
1. Built Chart of Accounts
2. Employees
The following steps will show you the recommended order of setting up Payroll.
Step 1 Create and modify Payroll Types
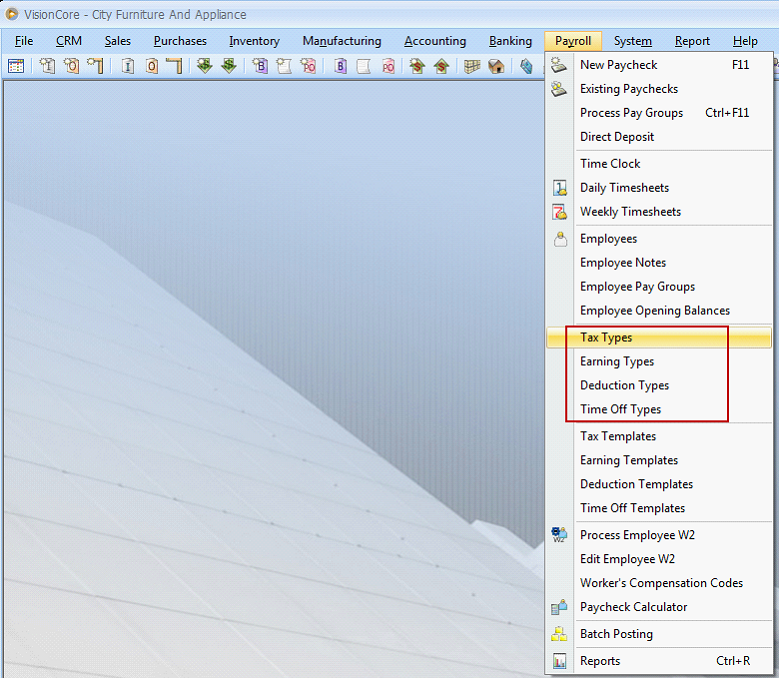
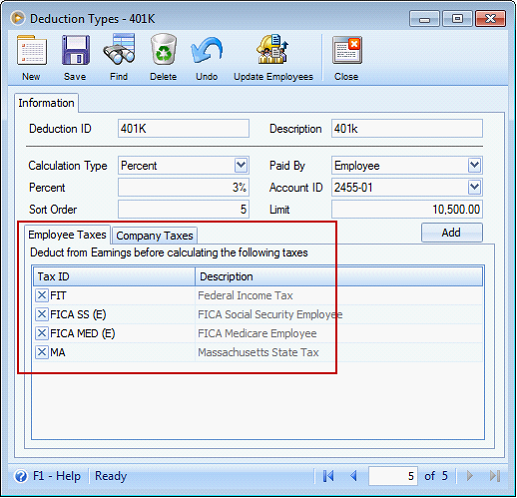
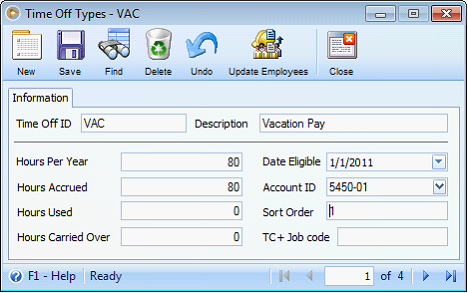
![]() VisionCore will generate some basic types for you to begin working with such as FIT, FICA SS and FICA Med. Add new Types to Tax, Earning, Deduction, and Time Off areas.
VisionCore will generate some basic types for you to begin working with such as FIT, FICA SS and FICA Med. Add new Types to Tax, Earning, Deduction, and Time Off areas.
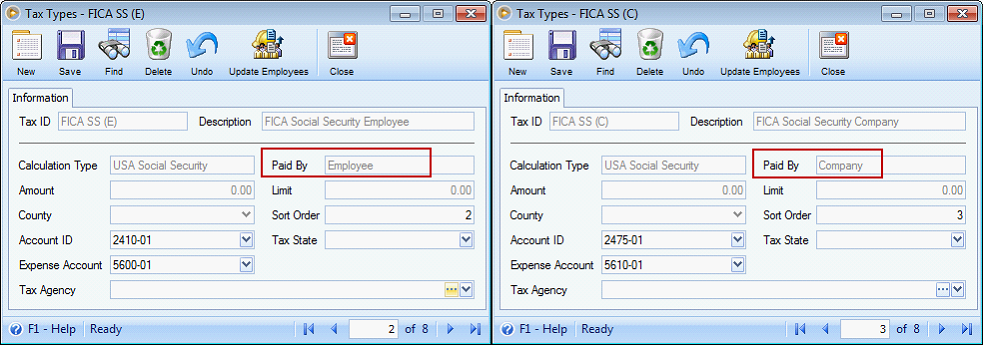
>Tax Type is setup either Paid By ‘Employee’ or ‘Company’.
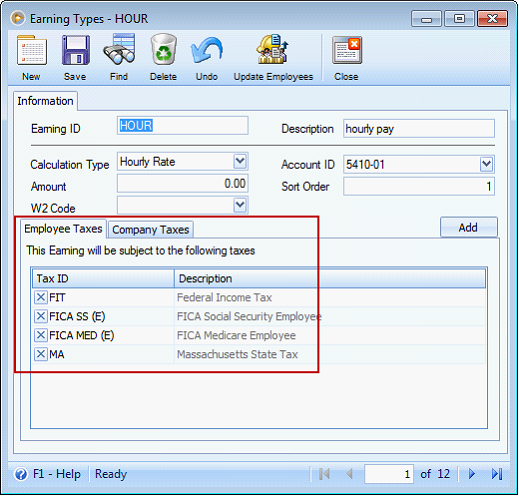
>Earning Type can either subject to taxes or not. Add taxes in the Empoyee or Company Taxes tabs if those are subject to taxes.
>Deduction Type can either be deducted from earnings before calculating taxes. Add taxes in the Employee and Company Taxes tabs if those need to be deducted from earnings before calculating the tax.
>Time Off Type can be setup for a time not worked by an employee but is either paid at a regular rate, a fixed rate or any prorated amount. In here, Hours Accrued must be entered with a number of hours entitled for an employee’s time off.
![]() Change Account IDs as necessary for each type.
Change Account IDs as necessary for each type.
![]() It is important to make sure the Payroll Types are setup correctly as this is the foundation to generating payroll.
It is important to make sure the Payroll Types are setup correctly as this is the foundation to generating payroll.
See also How Update Employees button works.
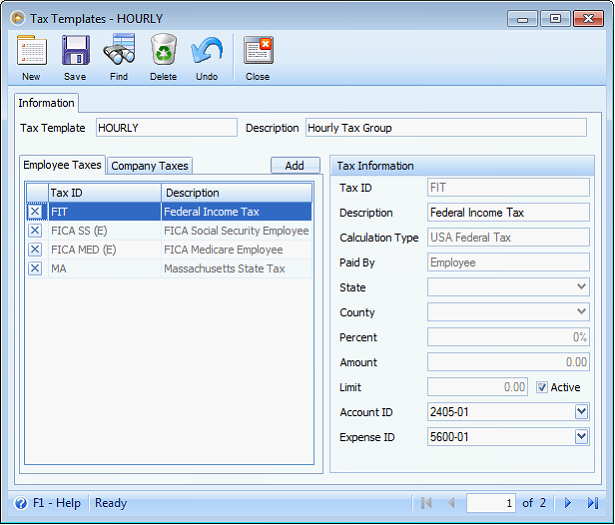
Step 2 Decide if you want to create Payroll Templates
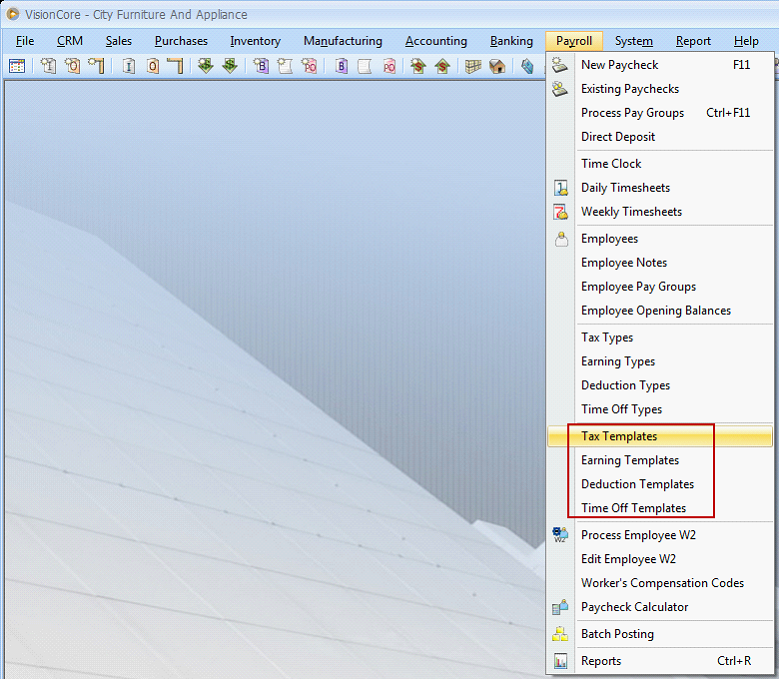
•Payroll Templates can save you time.
•It allows you to group Types together and quickly pull those Types into your Employees.
•This is good for companies who have many employees with similar or common types.
>Decide on Group names that fit your needs.
>Create the Group name.
>Select the types to be used for that Group.
>Keep it general to avoid making lots of changes at the employee level.
Here are examples of Tax, Earning, Deduction and Time Off templates.
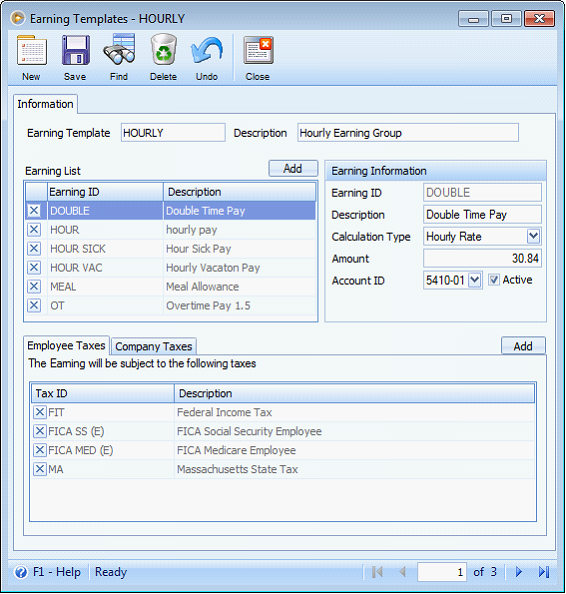
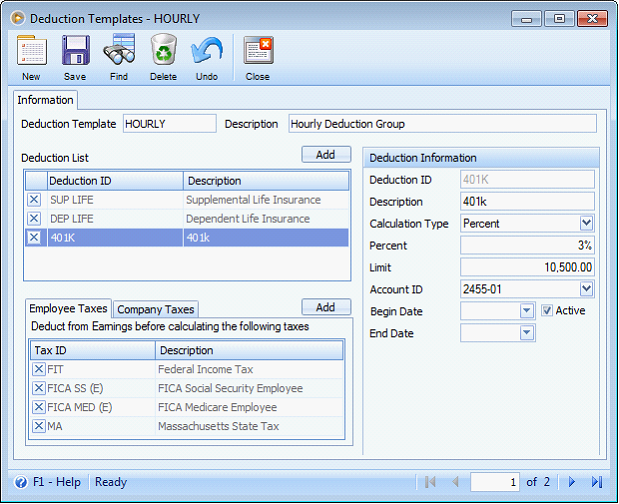
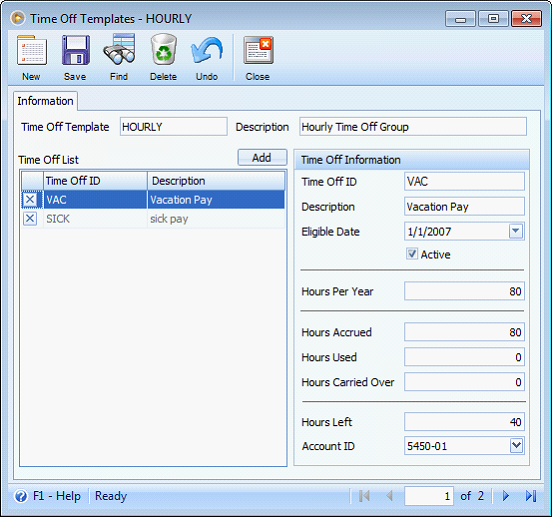
See also How to setup a Template and How to use Payroll Template to setup employee.
Step 3 Create or Edit Employee Pay Groups
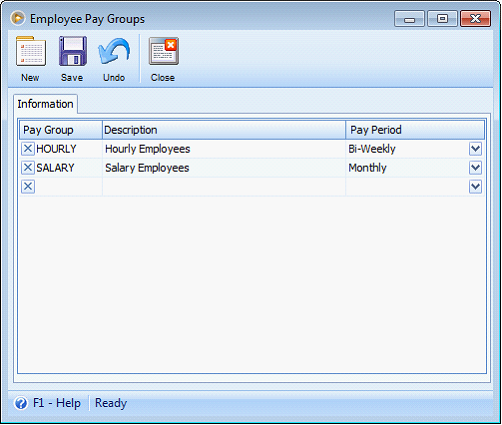
![]() Grouping your Employees by Pay Group and Pay Period will allow you to create a group of paychecks at one time.
Grouping your Employees by Pay Group and Pay Period will allow you to create a group of paychecks at one time.
![]() You must assign the Pay Group and Pay Period to each Employee.
You must assign the Pay Group and Pay Period to each Employee.
![]() Default Pay Groups are created which can be modified, if necessary.
Default Pay Groups are created which can be modified, if necessary.
![]() Add new Pay Groups to fit your business needs.
Add new Pay Groups to fit your business needs.
See also How to process Paychecks for several employees.
Step 4 Time Sheet, Time Clock or Default Hours?
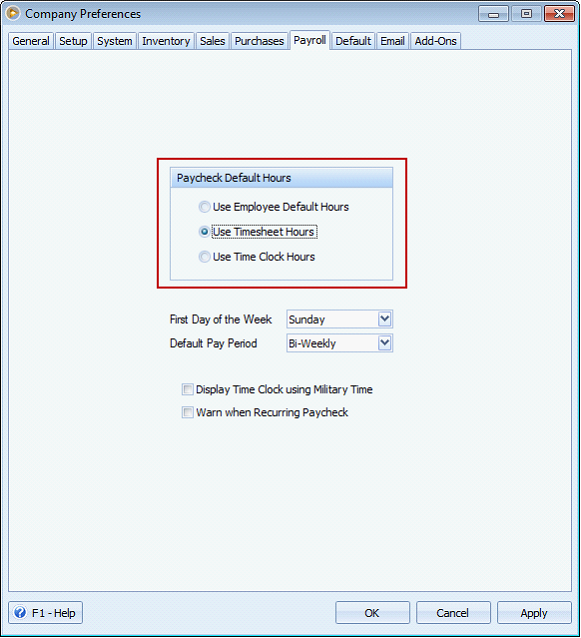
Select this option from the System pull down. Go to the Company Preference form in the Payroll tab to select the option: Use Employee Default Hours, Use Time Sheet Hours or Use Time Clock Hours.
![]() Does your company want to work with Time Sheets?
Does your company want to work with Time Sheets?
>Working with Time Sheets means you will enter either daily or weekly the Employee’s hours by Earning Type.
>This Time Sheet data can be pulled into the paychecks that you create.
![]() Or do you want to work with Default Hours?
Or do you want to work with Default Hours?
>In the Employee Setup form within the Earnings tab you can select default hours per Earning Type. An example would be for Hourly Earnings to put 80 in the default hours
field.
>As you create paychecks for your employees, these default hours will pull into the paychecks and calculate out by the Earning Type rate.
>The default hours can be modified on the Paycheck as necessary.
•Or would it be Time Clock Hours?
>Selecting Time Clock Hours means you will enter the number of hours worked by an employee by Earning type.
>This Time Clock Data can be pulled into the paychecks that you create.
>To give you an overview on how this works, see these topics below:
- Enable Time Clock Hours Calculation
- Processed Hyperlink on Time Clock
- Overtime computation using Time Clock Hours
Step 5 Go to Employee Setup form.
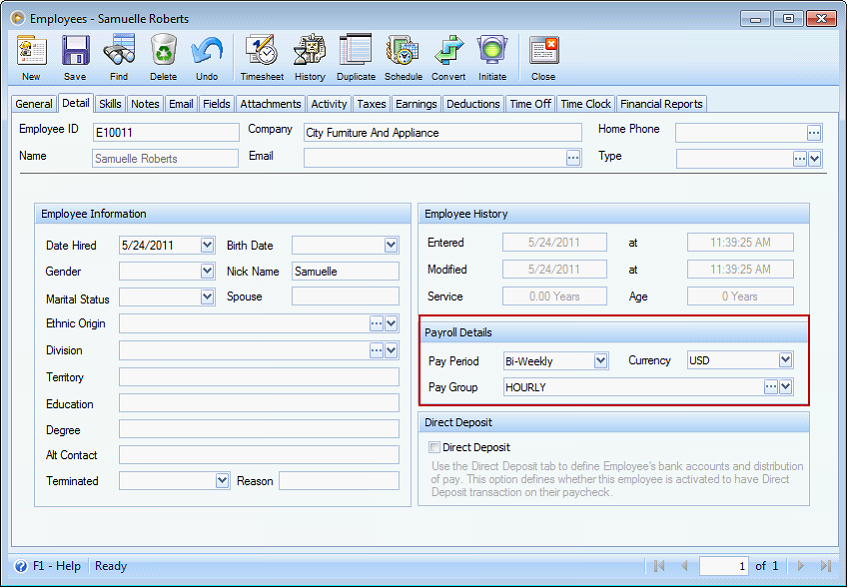
![]() In the Detail Tab select the appropriate Pay Period and Pay Group.
In the Detail Tab select the appropriate Pay Period and Pay Group.
![]() Pull in the appropriate Types per Employee or select the appropriate Group.
Pull in the appropriate Types per Employee or select the appropriate Group.
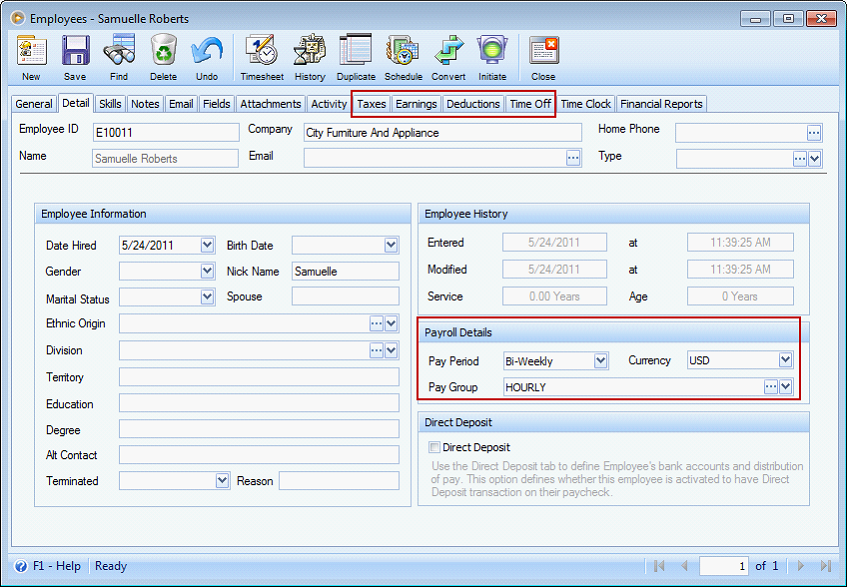
![]() Make changes as necessary in the Taxes, Earnings, Deduction and Time Off Tabs.
Make changes as necessary in the Taxes, Earnings, Deduction and Time Off Tabs.
See also How to process Paychecks for several employees.
Step 6 You are ready to generate Paychecks.
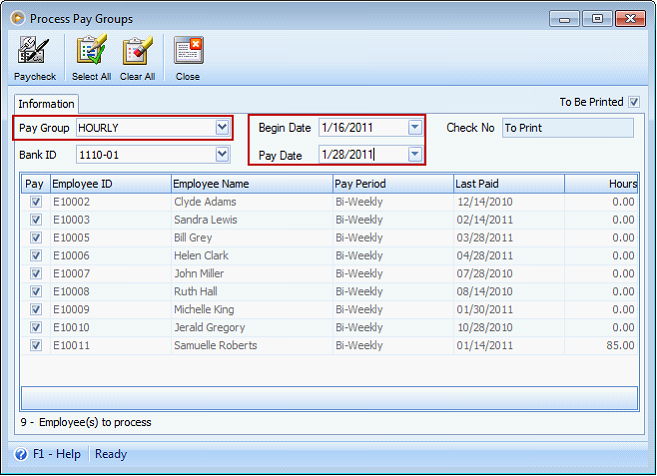
![]() You can generate checks through the Process Pay Groups form.
You can generate checks through the Process Pay Groups form.
>Go to the Process Pay Group form and select the Pay Group you wish to generate checks for.
>Set all the correct date information and the next check number.
>Uncheck any Employees who will not be getting a check during this period.
>Create Paychecks.
![]() You can also create checks one at a time through the Paychecks form.
You can also create checks one at a time through the Paychecks form.
>Select the New button at the top of the Paychecks form.
>Select the Employee ID and the paycheck will fill in with the default payroll information for that Employee.
>Modify the check and post when ready.
Other Paycheck related topics:
Allow Admin user to modify FICA fields in Paycheck
How to process Paychecks for several employees
Process paychecks where To Be Printed checkbox is checked
Process paychecks where To Be Printed checkbox is unchecked
Step 7 Review the Paychecks that were created.
![]() Go to the Paychecks form to see the checks that were just created.
Go to the Paychecks form to see the checks that were just created.
![]() Review these checks and make any necessary changes.
Review these checks and make any necessary changes.
Step 8 Post Paychecks
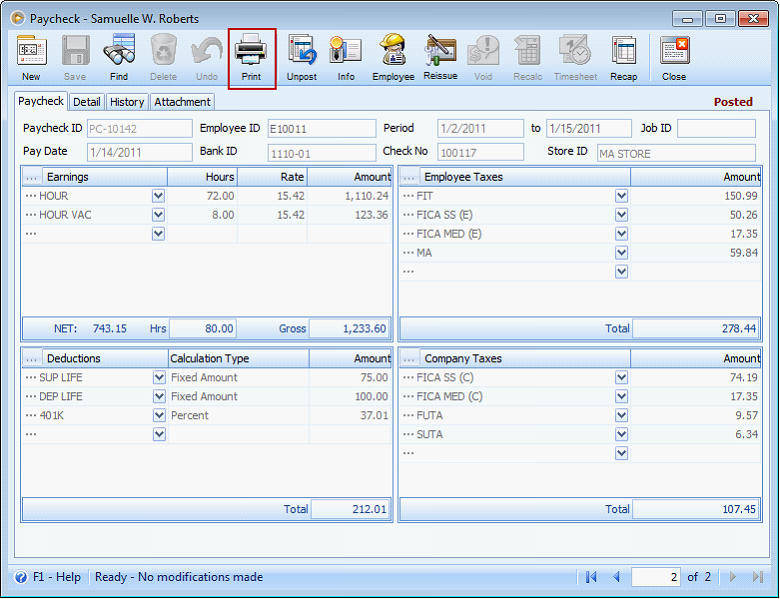
![]() Paychecks can be posted one by one through the Paycheck form.
Paychecks can be posted one by one through the Paycheck form.
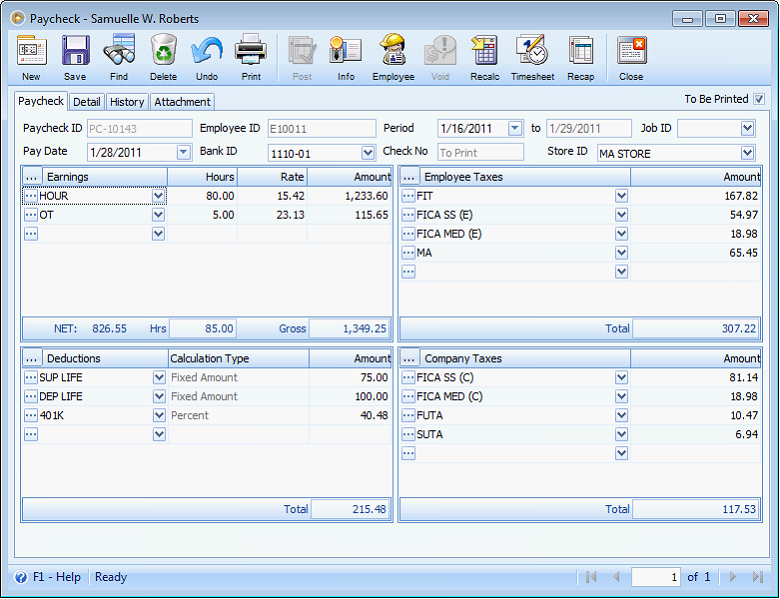
![]() Note if To Be Printed checkbox is checked then you will have to Print first the paycheck before you can post it. See Assign Check Number after printing.
Note if To Be Printed checkbox is checked then you will have to Print first the paycheck before you can post it. See Assign Check Number after printing.
Post and Print paycheck related topics:
Printing paycheck before posting
Posting paycheck before printing
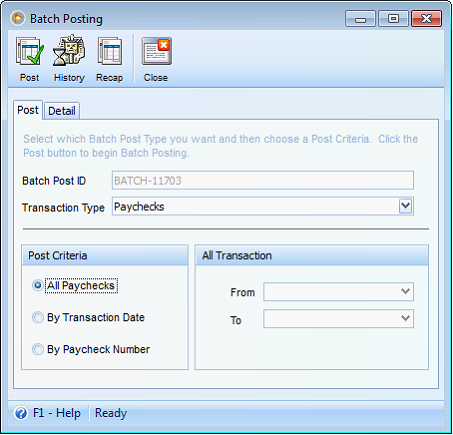
![]() Another option is to Batch Post the Paychecks.
Another option is to Batch Post the Paychecks.
Step 9 Print Paychecks
![]() Checks can be printed through the Paycheck form by clicking the Print button on top of the form.
Checks can be printed through the Paycheck form by clicking the Print button on top of the form.
![]() Note if To Be Printed checkbox is checked then you will have to Print first the paycheck before you can post it. See Assign Check Number after printing.
Note if To Be Printed checkbox is checked then you will have to Print first the paycheck before you can post it. See Assign Check Number after printing.
Printing related topics:
Watermark DO NOT CASH on reprinted checks
Show Time-Off Accrual Info on Pay Stubs
Printing paycheck before posting
Posting paycheck before printing
If you have TimeClock Plus Integration, you can check online topics on the link below:
http://www.comtechsolutions.com/help/visioncore_timeclock_plus_integration/