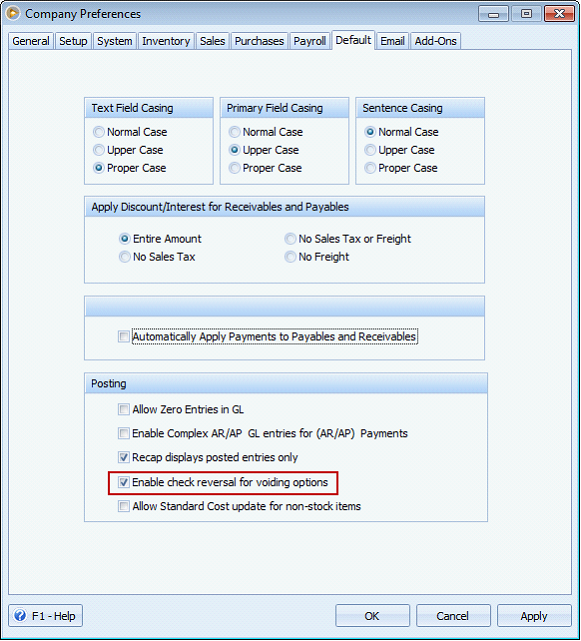
Voiding Write Checks when Enable check reversal for voiding options is enabled
The following steps will show you how the voiding process be when Enable check reversal for voiding options is enabled.
This option can be opened on Company Preferences form > Default tab.
1.This is the original Write Check transaction.
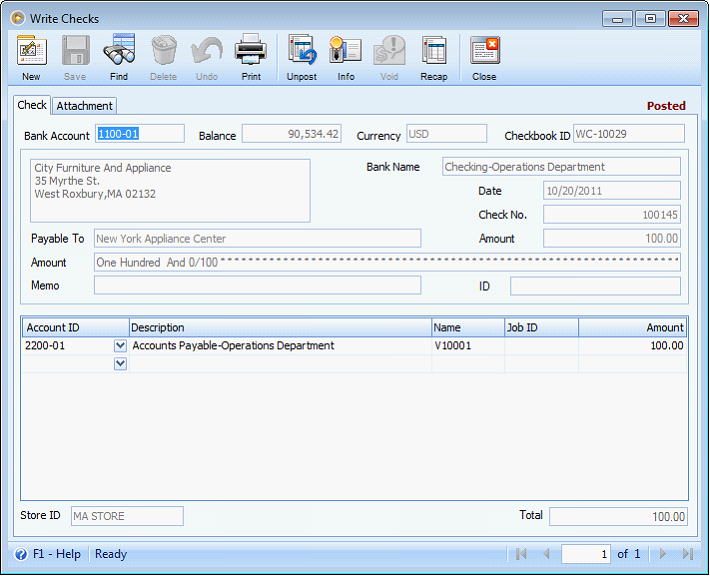
2.Clicking Unpost button will open the Void Check Options form. In this form, you will need to enter the date when the check is reversed in the Check Reversing Date field. After entering the date, click OK.

![]() Note: Voiding a write check will create a reversal write check transaction. See below how this will change the original write check transaction and how the reversal write check transaction will look like.
Note: Voiding a write check will create a reversal write check transaction. See below how this will change the original write check transaction and how the reversal write check transaction will look like.
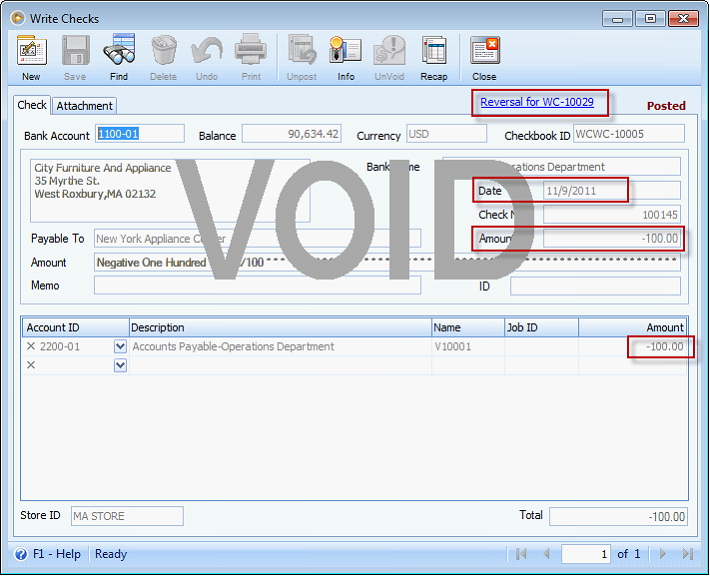
Here is how the original write check will look like after the reversal.
a.)At the top right of the form, there will be a hyperlink that says ‘Reversed on <Date of Reversal> in <Checkbook ID of reversal write check>. Clicking that link will bring you to the reversal write check transaction.
b.)Memo field will show a prefix of (Void).

Here is how the Reversal Write Check will look like.
a.)At the top right of the form, there will be a hyperlink that says ‘Reversal for <Checkbook ID of original write check>. Clicking that link will bring you to the original write check transaction.
b.)Date field will have the date you entered in the Check Reversing Date field of Void Check Options form when you Unposted the original write check transaction.
c.)Amount fields will show a number opposite to that of the original write check.
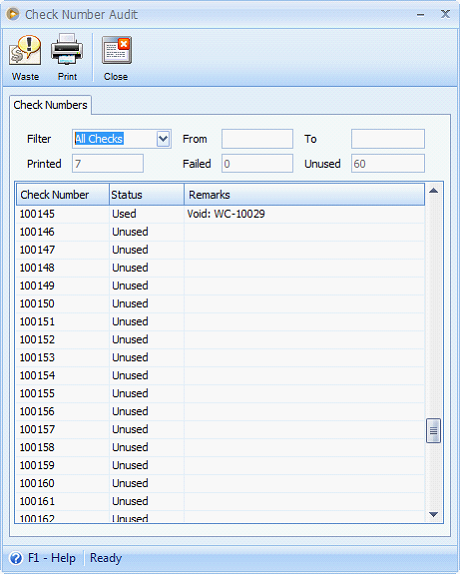
Check Number Audit impact:
Both the original and reversal write check transaction will have the same check number and the said check number will have a void remark in the Check Number Audit form.
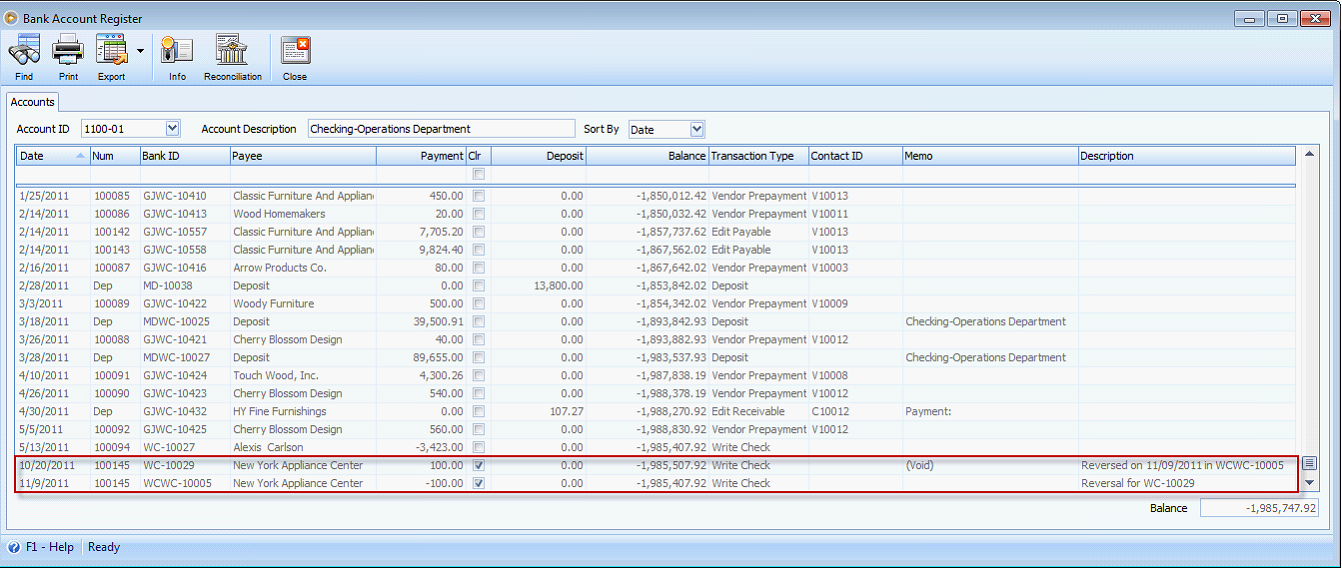
Bank Register impact:
This is how the original and reversal write check transaction will look like. Take note that both will be marked as Cleared.
Bank Recon impact:
Since both are cleared, those will not anymore show in Bank Reconciliation form or even when printing previous reconciliations.
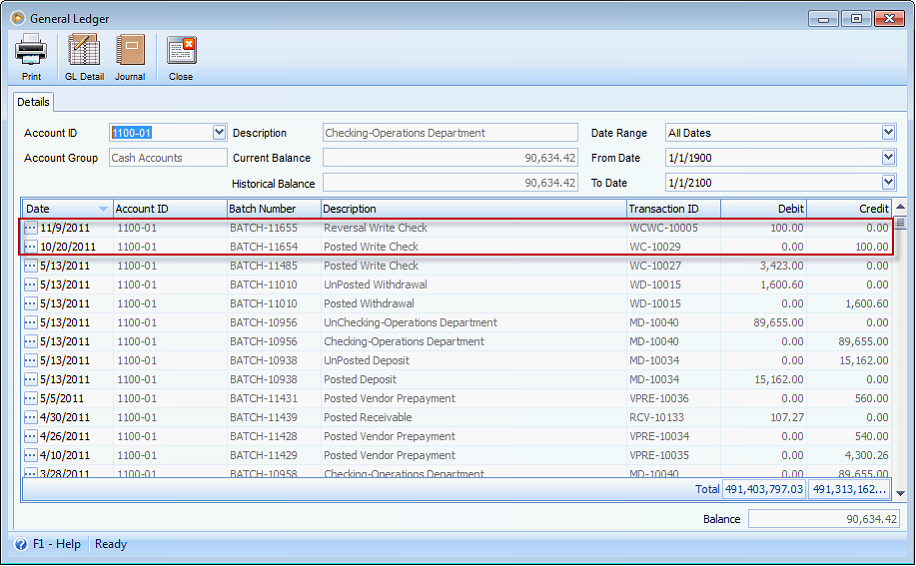
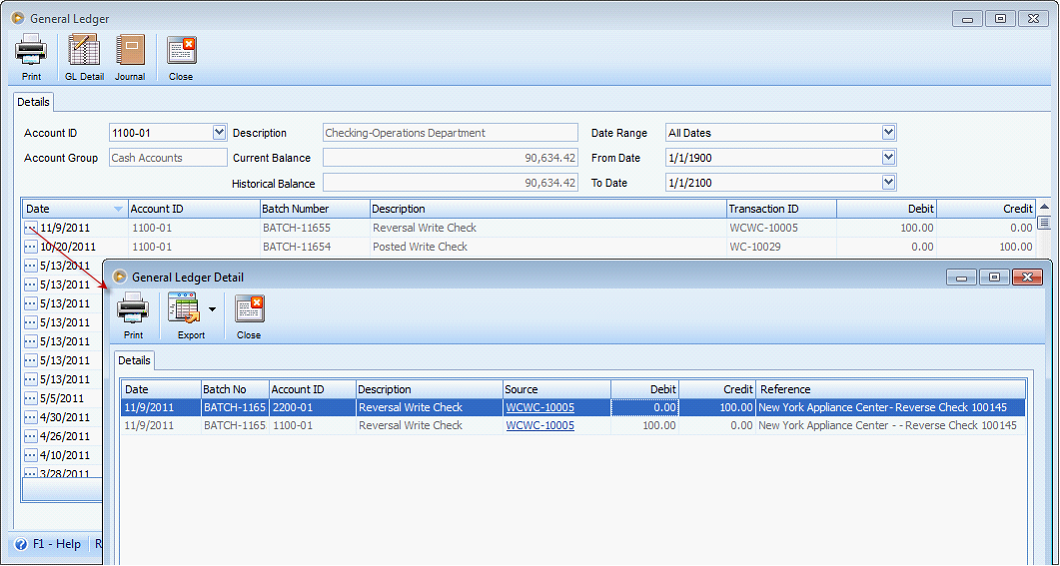
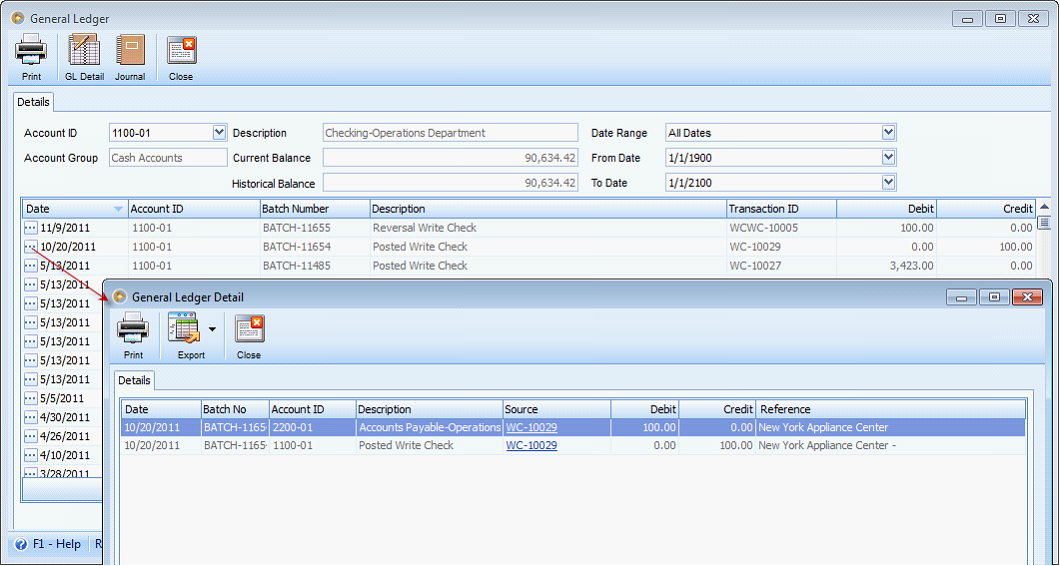
General Ledger impact:
Reference: Bug 4031