Installation & Setup: SQL 2005 Configuration
Configuring SQL Server 2005 to work with VisionCore
1.There are a few settings that need to be enabled to allow SQL Server 2005 to work over the network.
2. Since SQL Server 2005 can be installed multiple times it uses a unique Instance Name to differentiate the multiple installs. When you installed SQL Server 2005 or the Express Edition it uses a default named instance unless you specified a named instance. We recommend specifying a named instance of VISIONCORE so you do not confuse it with other instances but it is not necessary. Throughout this document VISONCORE will be the assumed Instance Name. If you have entered a different Instance Name or simply used the default instance name, replace the VISIONCORE instance name with the name you used.
3.From the Start menu select Microsoft SQL Server 2005 | Configuration Tools | SQL Server Configuration Manager.

4. Under SQL Server 2005 Network Configuration select Protocols for VISIONCORE (or the Instance name you used when installing SQL Server 2005) and Enable the following:
Shared Memory
Named Pipes
TCP/IP

5. You will see a warning message box saying you need to stop and restart the service.

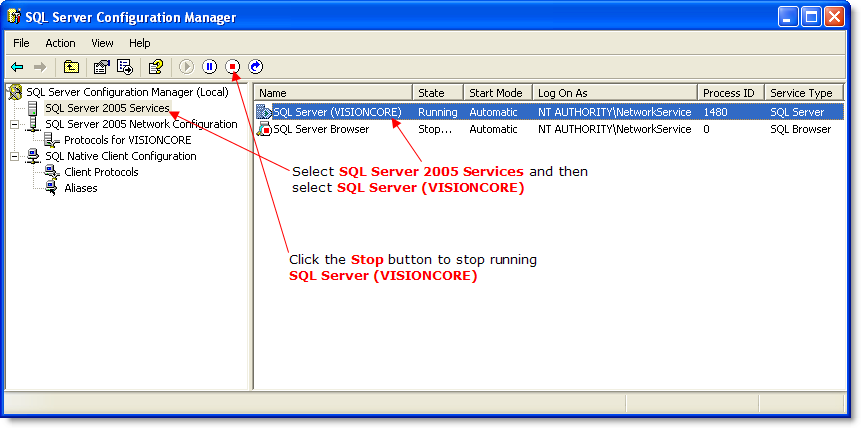
6. To stop the service, select SQL Server 2005 Services and then select SQL Server (VISIONCORE) (or the Instance name you used when installing SQL Server 2005). Then click the Stop button to stop running SQL Server (VISIONCORE).
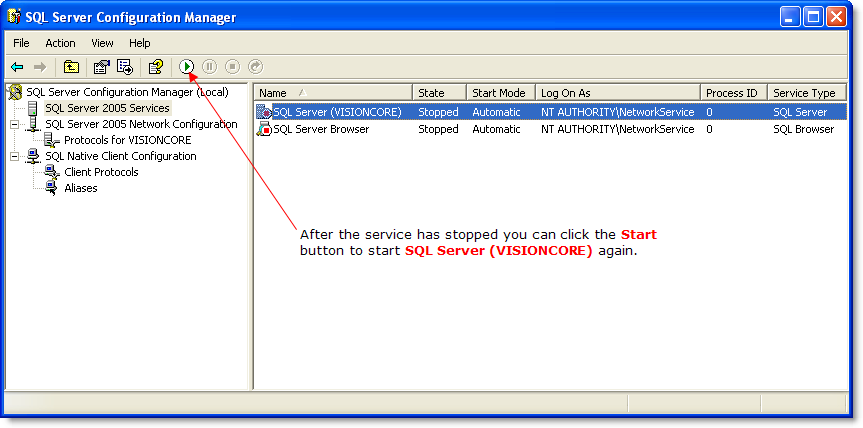
7. After the service has stopped you can click the Start button to start SQL Server (VISIONCORE) again.
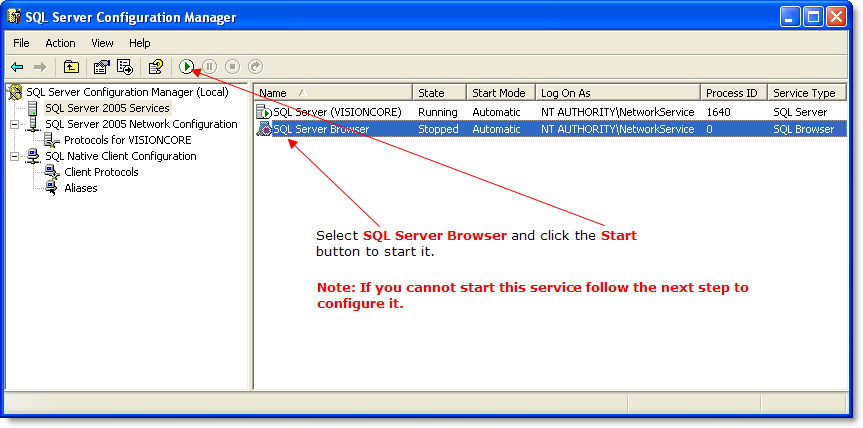
8. Select SQL Server Browser and click the Start button. If you cannot start the browser from here follow the next few steps.
9. On the Start menu, right-click My Computer, and then click Manage. In Computer Management, expand Services and Applications, and then click Services. Right click on SQL Server Browser and select Properties.
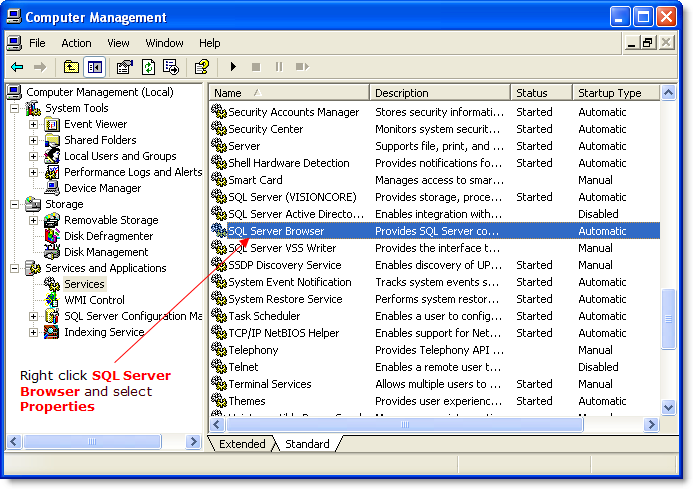
10. In the SQL Server Browser Properties window change Startup Type to Automatic and click the Start button to start the service.

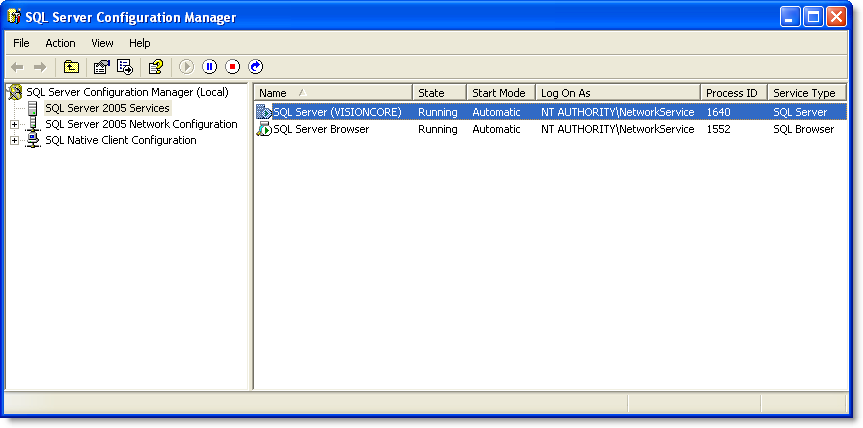
11. Now back in the SQL Server Configuration Manager both the SQL Server (VISIONCORE) and SQL Server Browser should be running.
12. Next make sure your Firewall is configured to allow files to be shared. If you are using the Windows XP built in Firewall open the Windows Control Panel select Windows Firewall and under the Exceptions tab make sure File and Printer Sharing is enabled.
13. Now you should Reboot your server.
Installing VisionCore on your Server
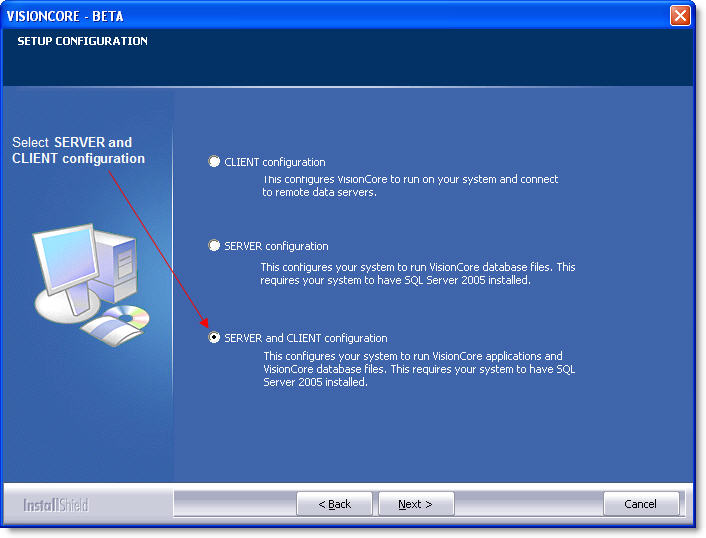
1. After you have installed SQL Server 2005 on your server you must install VisionCore using the Server Configuration. Run the VisionCore installation EXE and select SERVER and CLIENT configuration on the Setup Configuration screen.
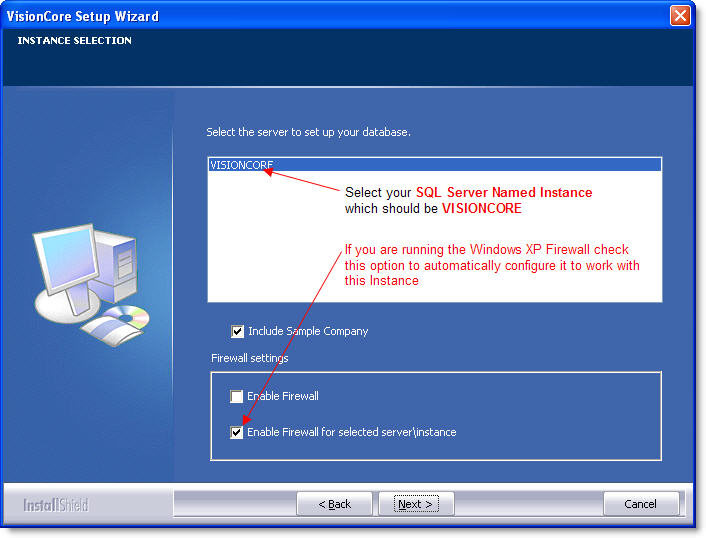
2. Select your SQL Server Named Instance which should be VISIONCORE. If you are running the Windows XP firewall you should select Enable Firewall for selected server\instance to configure it to work properly with VisionCore.
3. After the installation is complete you should Reboot your server again.
4. Now run VisionCore by double clicking on the Desktop icon.

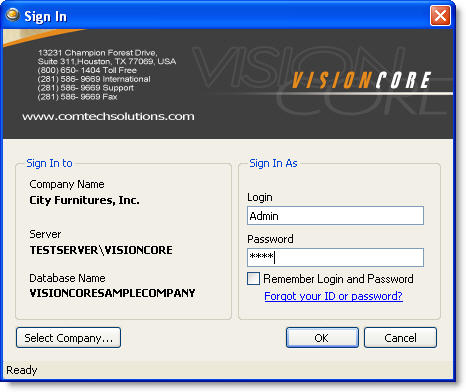
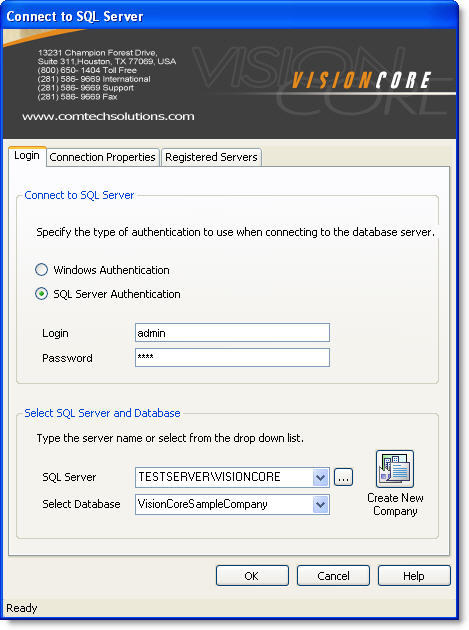
5. In the Connect to SQL Server form, select SQL Server Authentication and enter your Login and Password. If you have installed the SQL Server 2005 Express Edition you can use Admin for the Login and 1234 for the Password. Then select the SQL Server which should be your Servers Computer Name followed by a backslash and the SQL Server Instance name which should be VISIONCORE. It will look something like this: TESTSERVER\VISIONCORE. Then in the Select Database combo box select either the VisionCoreSampleCompany or a database you created with VisionCore. Click the OK button to continue.
6. The Sign In form will appear. The Login for the VisionCoreSampleCompany is Login: Admin and Password: 1234