Direct Deposit – NPC Pay 2
This documentation will show you how Direct Deposit - NPC Pay 2 works.
I. Employee setup
Direct Deposit checkbox must be enabled.
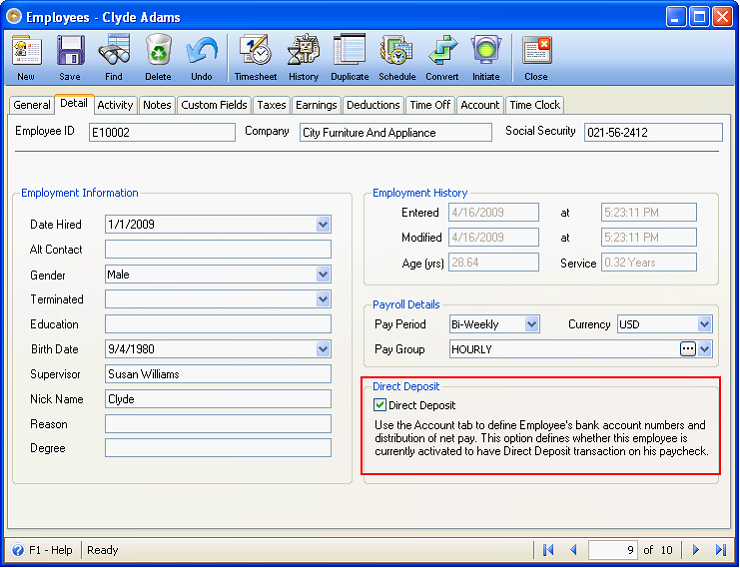
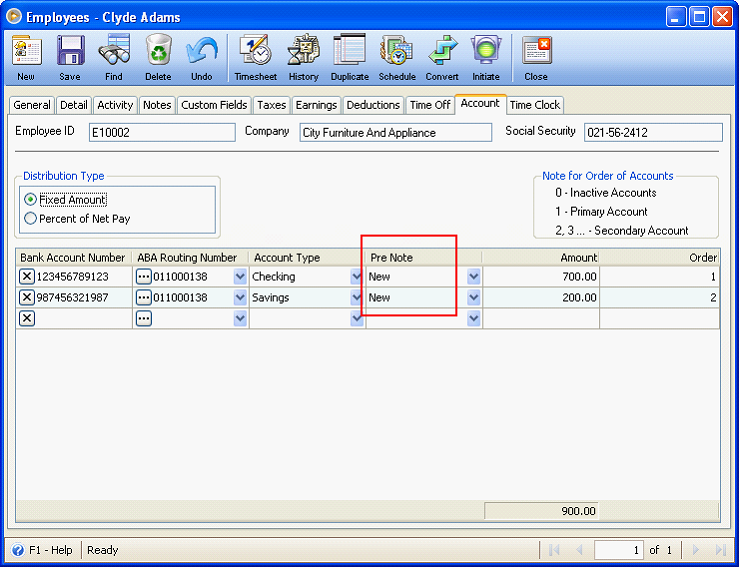
Configure the Direct Deposit’s required information in the Accounts tab.
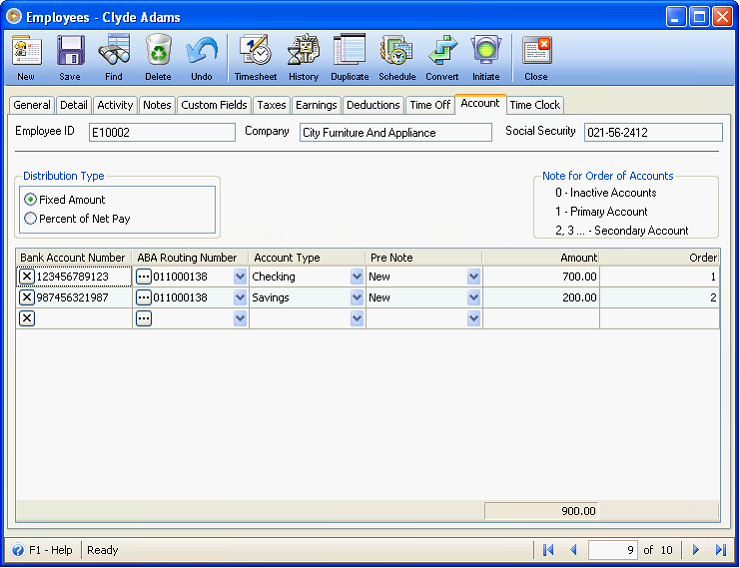
The Distribution Type area gives you option to distribute employee’s net pay either as Fixed Amount or Percent of Net Pay. In this example, we will use Fixed Amount.
The Note for Order of Accounts area is used to show the numbers to use in the Order field (grid area). This number is used to arrange the account’s order of priority for direct deposit, with 1 as the highest.
Grid area
The Bank Account Number is used to enter the employee’s bank account number.
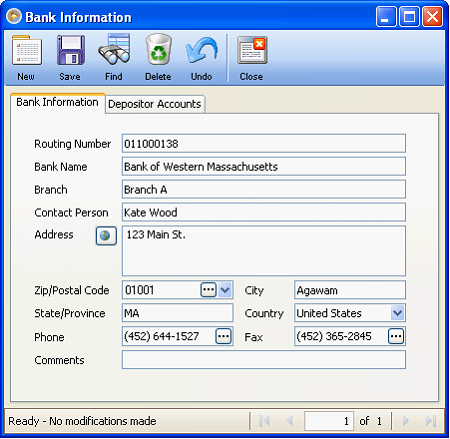
The ABA Routing Number is used to enter a 9-digit numbers assigned to the financial institution. Click on the ellipse button on this field to open the Bank Information form where you can fill in the Routing Number, Bank Name, Branch and so on.
The Account Type field is used to set the account’s type, either Savings or Checking. By default, this field will show “Savings”.
The Pre Note field signifies the account’s status. If this is the first time the employee is configured for direct deposit then Pre-Note will automatically be defaulted to “New”.
Pre-note is a means of sending the bank information of the employees to the direct deposit company. The direct deposit company will then verify the validity of the bank account and will send notification to the direct deposit user. With this pre-note, your bank information (not your money) is submitted to your bank to make sure all information is correct protecting your money from being deposited incorrectly.
The Amount/Percent field is used to enter how much of the net pay will be deposited to the selected bank account number. This field will show “Amount” if Fixed Amount is selected in the Distribution Type area and “Percent” if selected is Percent of Net Pay is selected. In this example, Amount field is shown.
The Order field is where you configure the order of Bank Account Number’s priority.
II. Paychecks
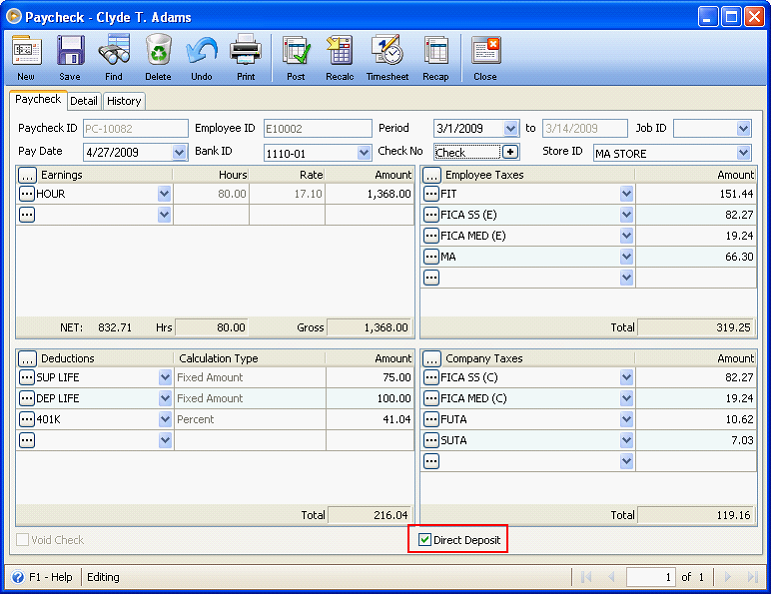
Once an employee is set as Direct Deposit, every time a paycheck is created for that employee, Direct Deposit checkbox will be enabled.
II. How NPC Pay 2 works
This illustration will show you the complete process of how Direct Deposit - NPC Pay works from having a Pre-Note = “New”.
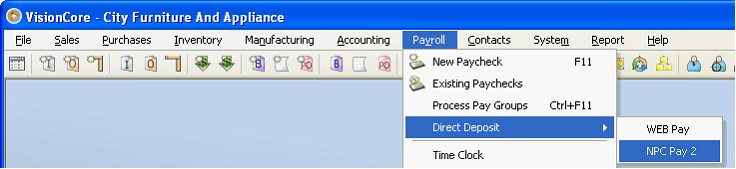
1. From Main menu go to System menu > Direct Deposit > NPC Pay 2
2. The Direct Deposit (NPC PAY) form will then be opened. This form is composed of 3 tabs and each is described below.
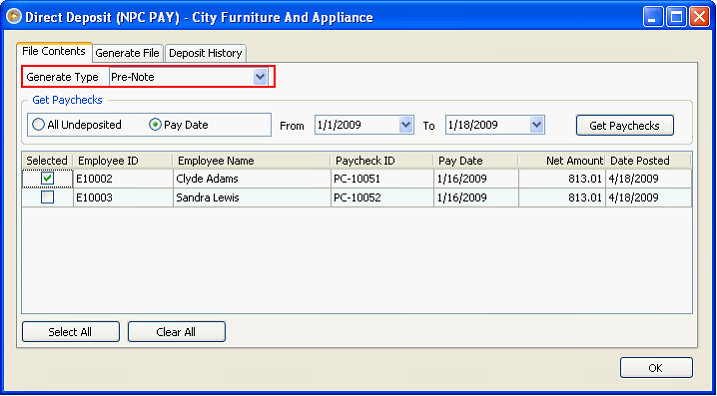
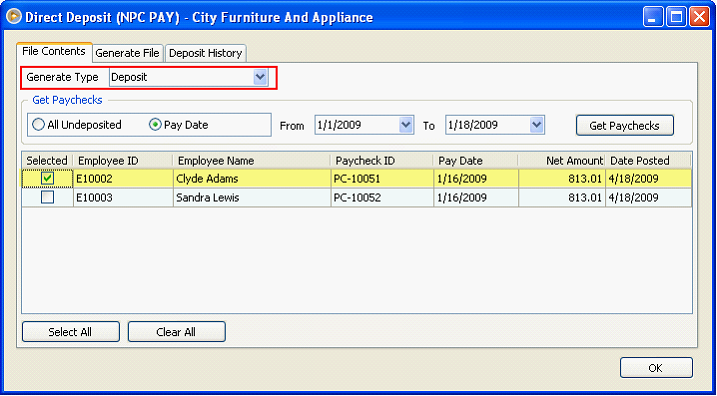
The File Contents tab is used to select paychecks that are to be directly deposited.
•Generate Type field is defaulted to Deposit.
When Pre-Note is selected, the process ends with generating the file - bank information of the employees who own the loaded paychecks.
When Deposit is selected, the process continues to amount distribution either by amount or percent depending on the settings configured for the employee in the Employee Setup form – Account tab
At this point, since Pre-Note in Employee Setup form – Accounts tab is still ‘New’, then Pre-Note must be selected in the General Type form.
Even the Generate Type is set to Pre-Note, there is still a need to load the employees’ paycheck.
•Get Paychecks options’ All Undeposited and Pay Date. This is used to filter paychecks that will be shown in the grid area. It is only when ‘Pay Date’ option is selected where From and To field is enabled.
•Clicking Get Paychecks button will display all paychecks that match the Get Paychecks criteria configured.
•Use the Select All button to select all paychecks displayed in the grid area.
•Use the Clear All button to clear all paychecks from being selected.
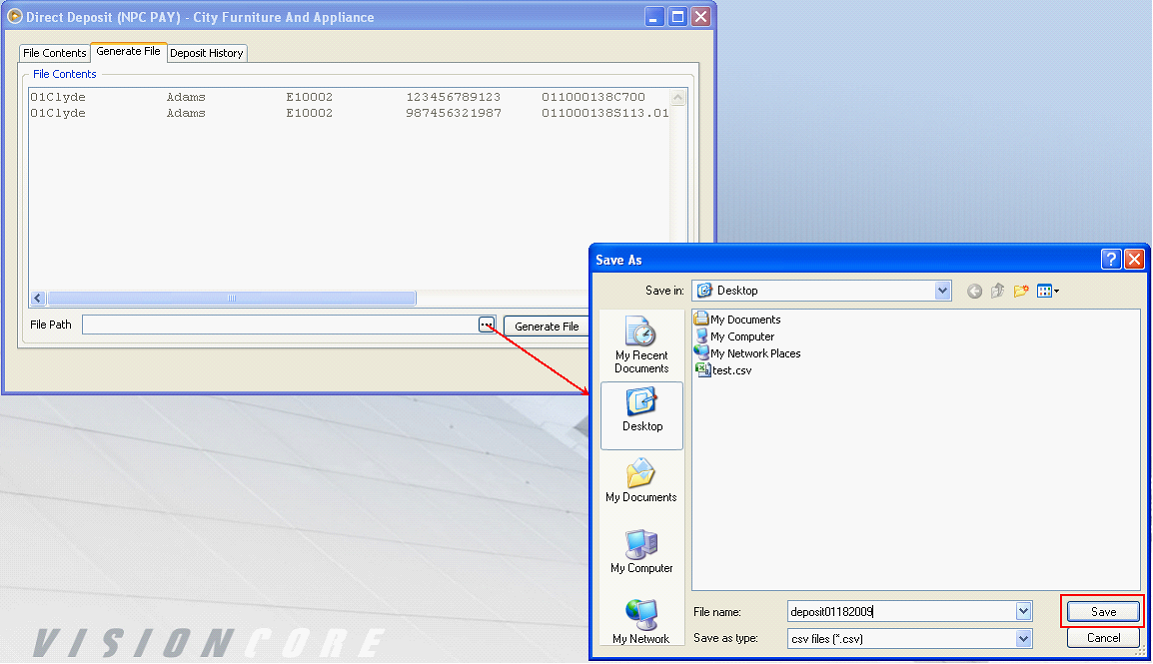
The Generate File tab is used to actually see a preview or a format specified for NPC Pay 2. Since Pre-note is selected in the File Contents tab - Generate Type field, then information shown in this tab is all about employees information entered/configured in Employee Setup form - Account tab.
The Previewed content includes the “Record Type”, ”First Name”, “Employee ID”, ”Bank Account Number” and “ABA Routing Number and Account Type”.
The File Contents area is read only to prevent user from directly changing it.
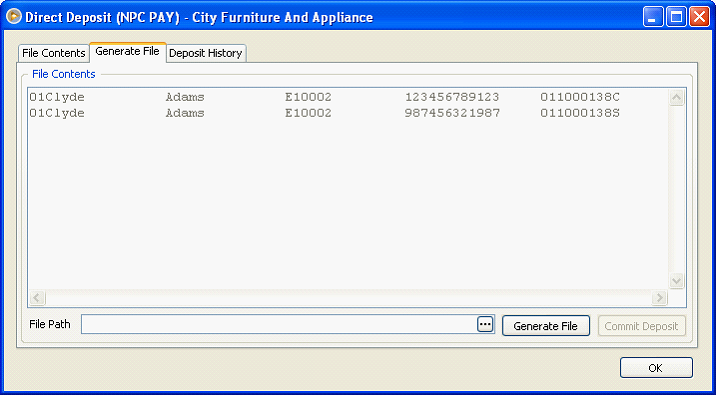
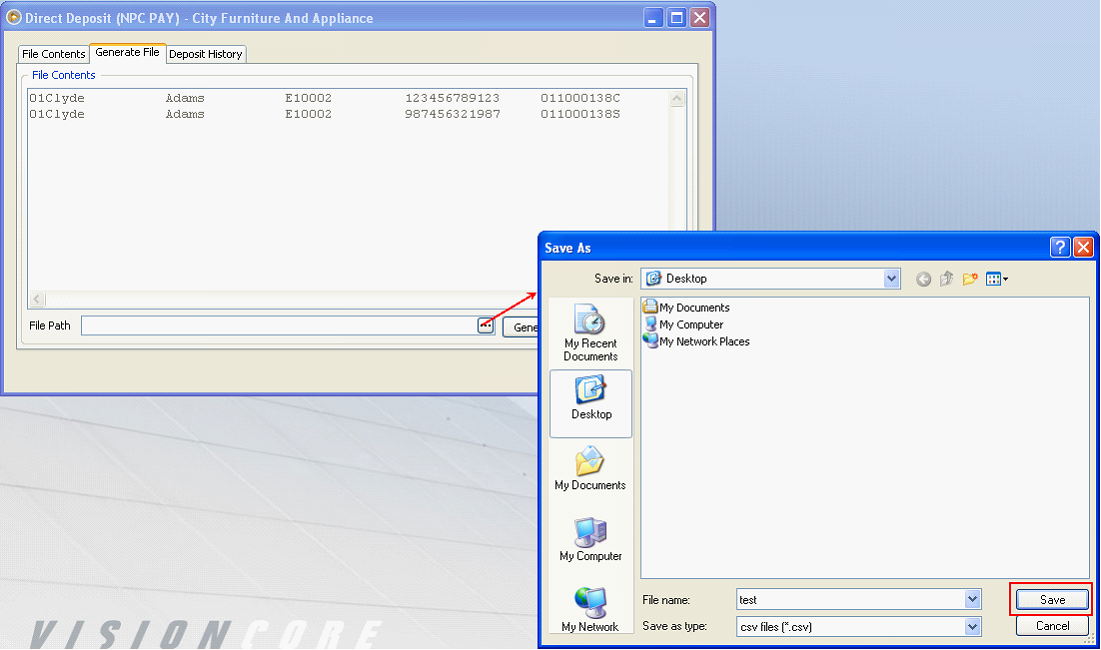
Click the ellipse button in the File Path field to open the Save as form where you can assign a file name for the file to be generated and click Save button.
Now click the Generate File button to complete the saving of the file generated.

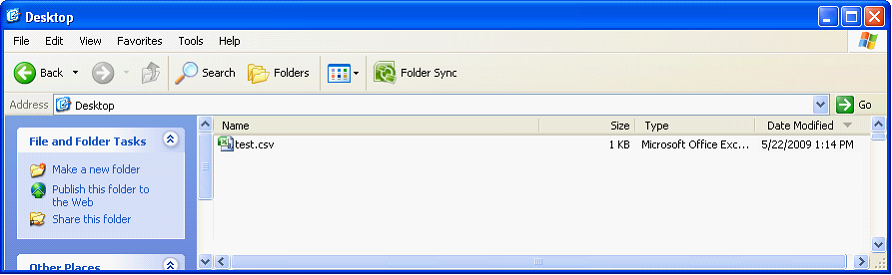
Here is now the saved employee information file. This is the file that will be sent to the bank.
Say the bank has confirmed that the validity of the Bank Account Numbers and can now accept transactions like deposit. You can now continue on with generating a file that includes the distribution of employee’s paycheck (either by amount or percent depending on the settings configured for the employee in the Employee Setup form – Account tab).
In the Generate Type field select Deposit.
Configure the get paychecks option like in this example, Pay Date is selected and then From and To fields are set to 1/1/2009 to 1/18/2009. Then click on Get Paychecks button.
Now go to Generate File tab and you will see a preview of the file that is to be generated.

Click the ellipse button on the File Path tab and assign a file name for the generated file and click Save button.
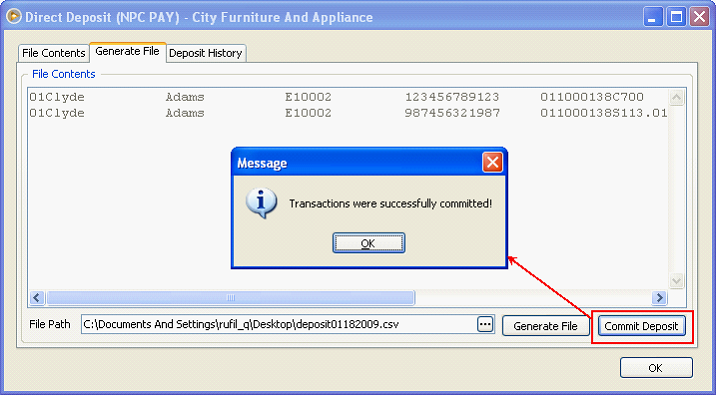
Now click Generate File button.

and then Commit Deposit button. A confirmation message will be shown. Click OK on that message.
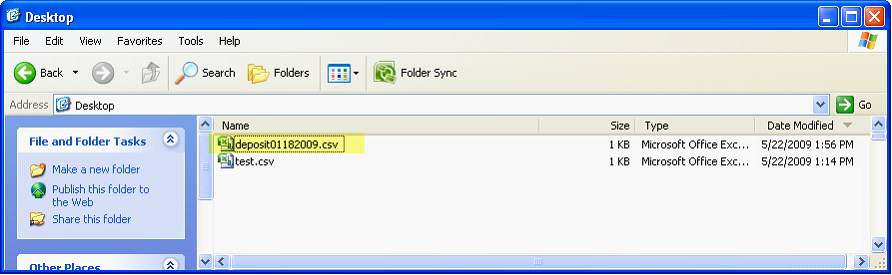
Here is the file created. This is the file that will be sent to the bank.
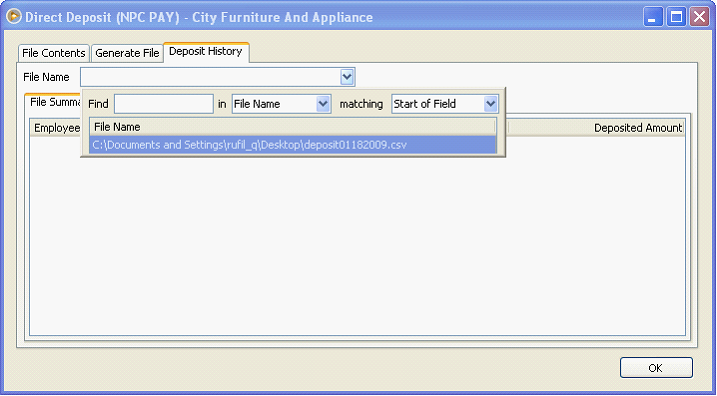
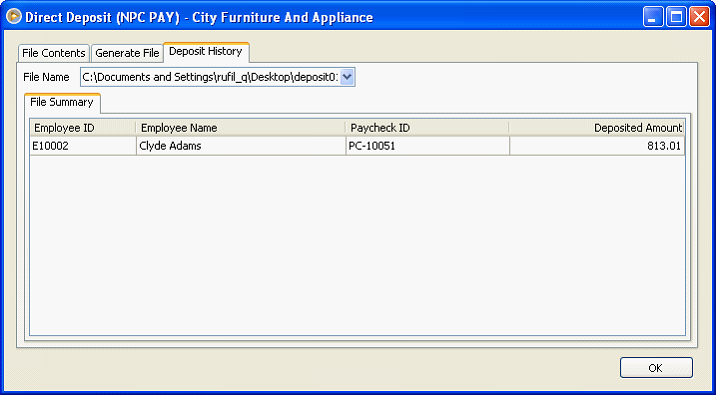
In case you would want to review later on a deposit generated file, you can use the Deposit History tab. Just select the file from the File Name tab and it will display the deposit file summary.