Assign Check numbers after Printing
By default, Assign Check numbers after Printing option is enabled on new company and VisionCoreSampleCompany. For existing company databases, this option is disabled by default.
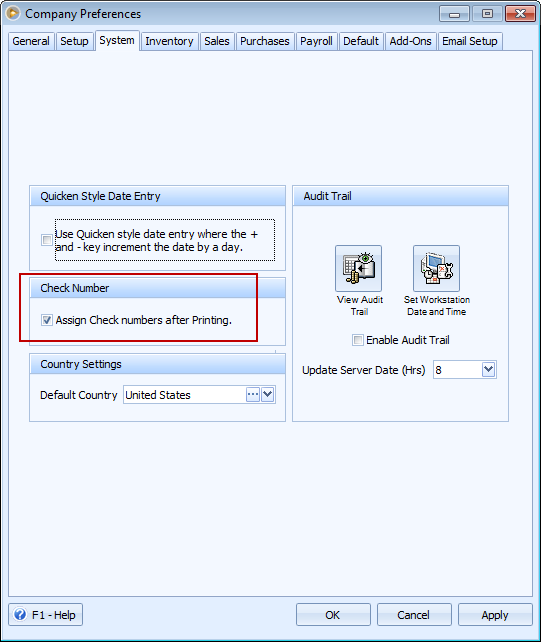
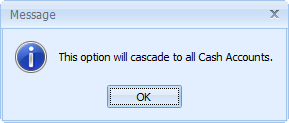
Enabling this option on existing company databases will show this message. This message simply reminds the user that the new check implementation will be enabled on all Cash Accounts.
Another that must be setup would be the Bank Account Information form – Check Number Range area and Backup Check Number Range area, which is optional.
The Bank Account Information form can be opened from Bank Account List form (Accounting menu > select Bank Account List > click Info button), Write Check form (Accounting menu > select Write Check > click Info button) and other Banking forms where Info button is shown.
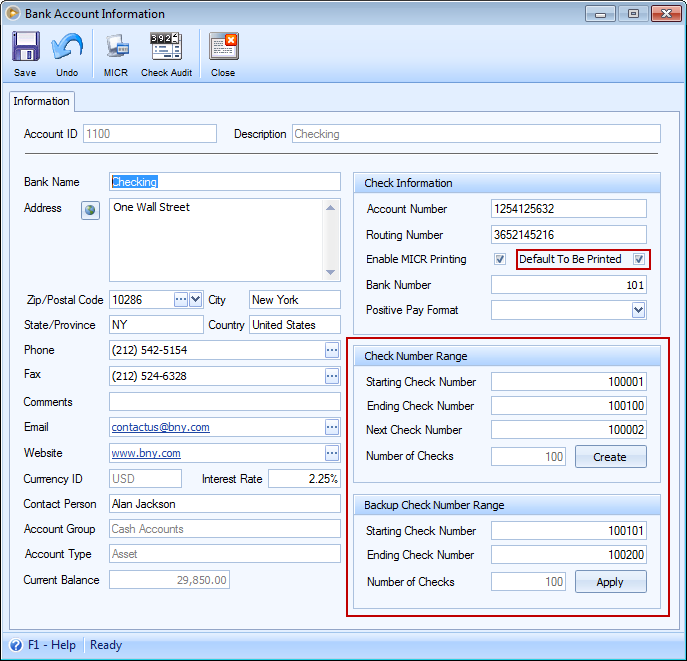
The Default To Be Printed checkbox by default, will be enabled if Assign Check numbers after Printing in Company Preferences form is enabled. However you have the option to disable it on the Bank Account Information form if you want to.
![]() Note that disabling the Default To be Printed checkbox on the Bank Account Information form for a particular bank account will not override the Assign Check numbers after Printing option in the Company Preferences nor other Cash Account records.
Note that disabling the Default To be Printed checkbox on the Bank Account Information form for a particular bank account will not override the Assign Check numbers after Printing option in the Company Preferences nor other Cash Account records.
Check Number Range
The Check Number Range area allows the user to enter the set of check numbers to be used when writing checks. This is where the Starting, Ending and Next Check Numbers are setup. Next Check Number is an important field for any checking accounts because it is used to automatically fill in your Next Check Number in different forms like the Write Checks, Pay Bills and Paychecks forms. Every time the check number is used it will automatically be incremented by one in this form. If you ever need to adjust or change the next starting check number it can be done in this form or in the Starting Numbers form.
The Create button in Check Number Range area when clicked will open the Check Number Audit form and create the check numbers. This same form shows the log of every check number in the check number range. During setup, status of newly created Check Numbers will show as ‘Unused’. As each check is used, status is changed to either ‘Printed’ or ‘Failed’.
Backup Check Number Range
This Backup Check Number Range allows the user to enter the next set of check numbers to be used when the Check Number range runs out. In cases where the check number in the Check Number range area runs out, there will be a message asking if you want to apply the Backup Check Number range to the main Check Number range.
The Apply button in the Backup Check Number Range area when clicked will simply apply the starting and ending check numbers from the Backup Check Number Range area to the to the main Check Numbers, which is the Check Number Range area. This will then update the Check Audit Trail form.
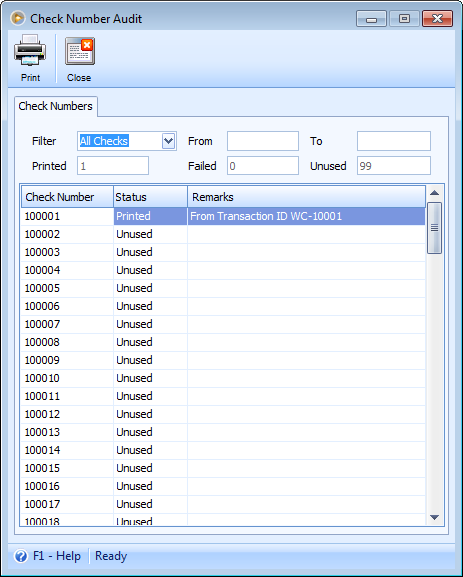
For existing companies where there are already existing posted check transactions and Assign Check numbers after Printing option in Company Preferences form is enabled, status of those check transactions will be shown as ‘Used’ with Remarks pointing to what transaction the check number is used.
How the new check printing works
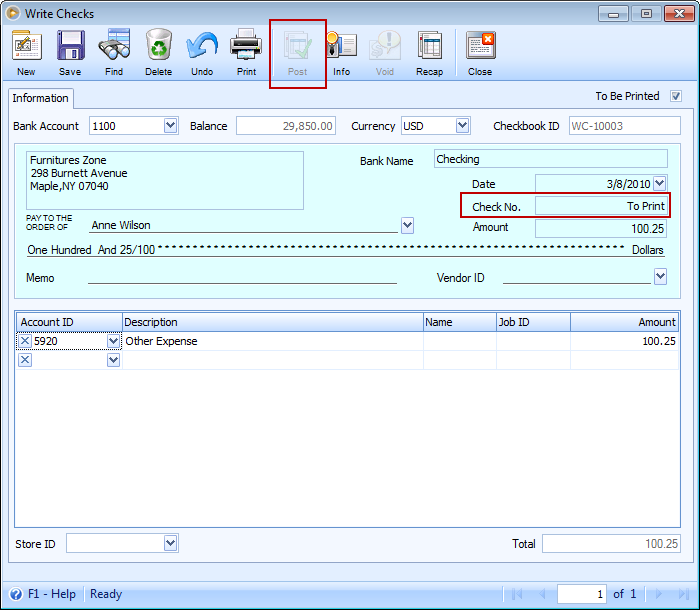
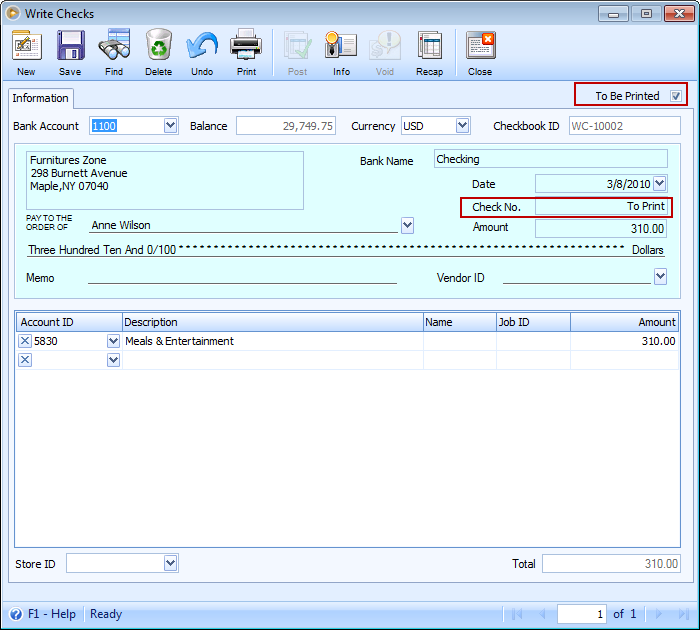
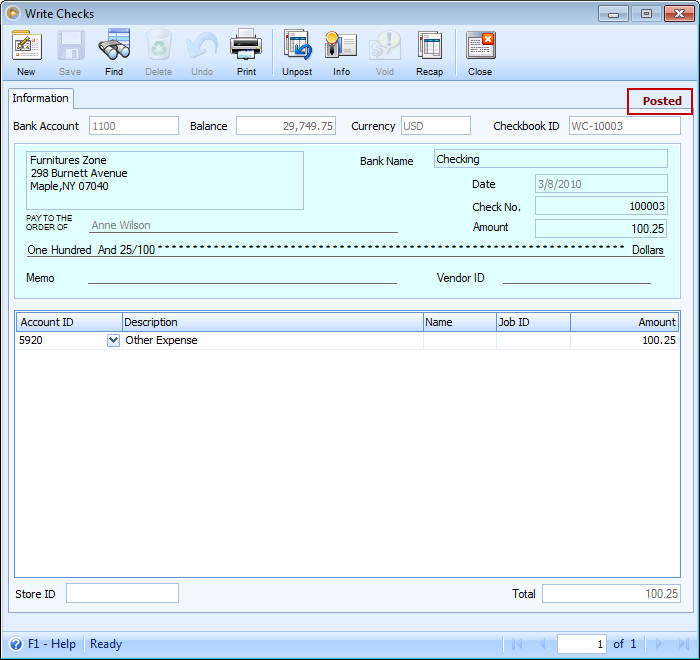
When you create a Write Check, Pay Bill [Multi-Vendor], Pay Bill, Vendor Prepayment, Customer Rewards, Paycheck and/or Process Pay Groups, by default, Check No. will show ‘To Print’.
Post button will also show as disabled since you will have to Print it first prior to posting the said transaction.
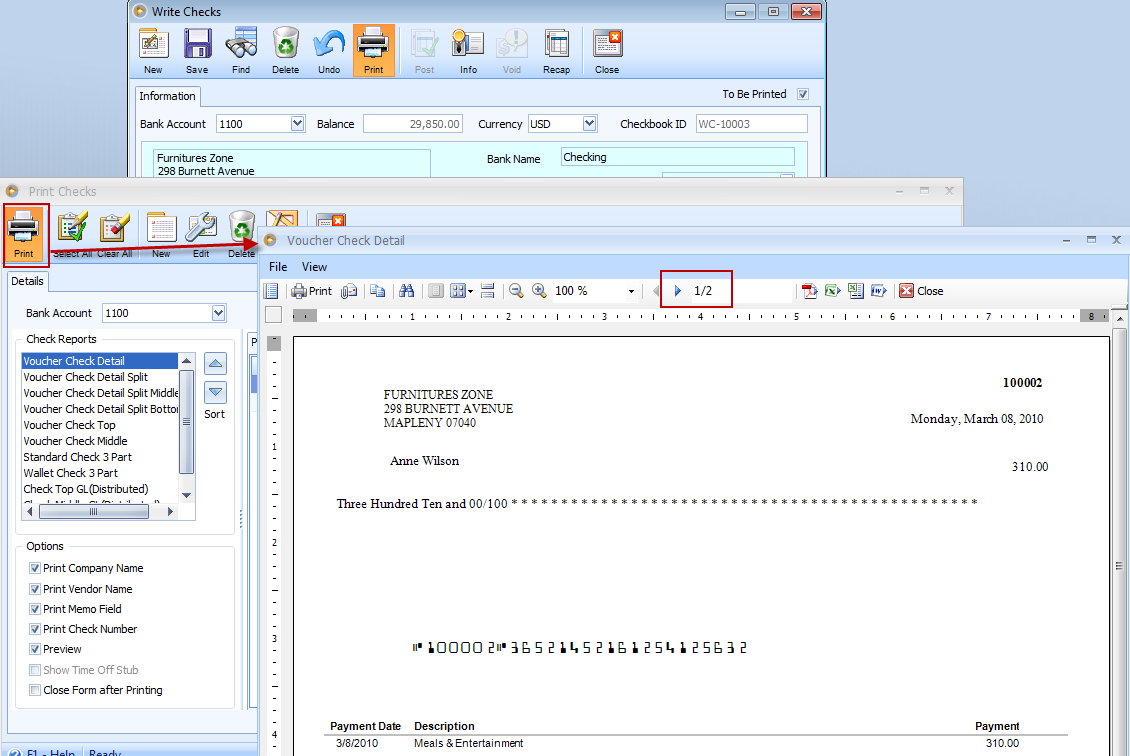
Example: Create a write check transaction. After filling in necessary information (notice that Check No. shows ‘To Print’ and Post button is disabled), click Print button.
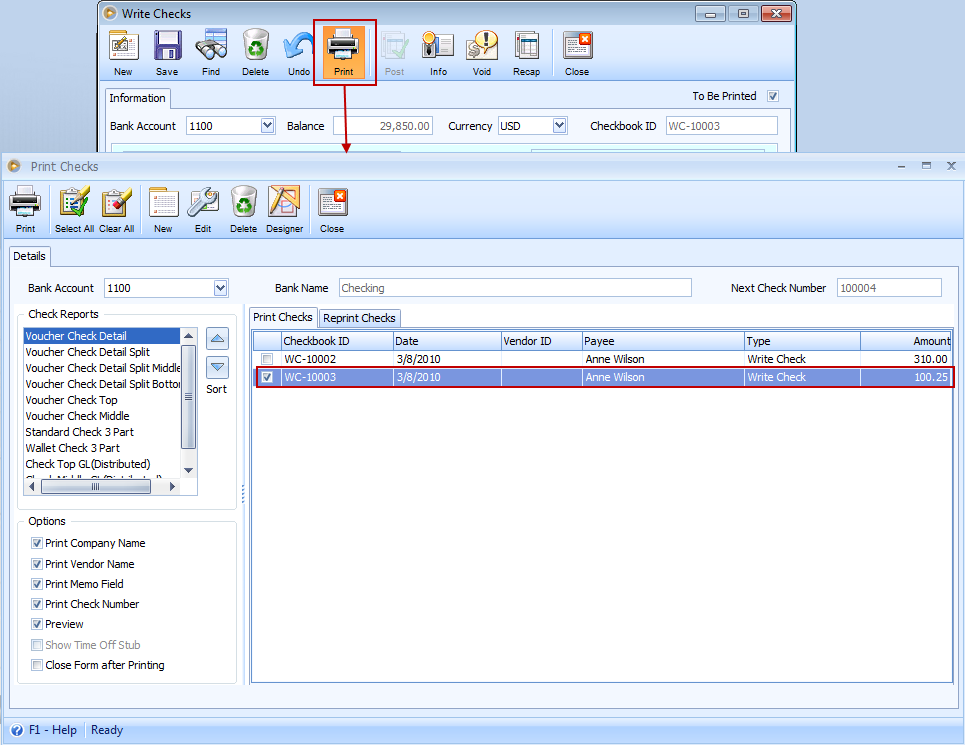
And this will open the Print Checks form. Checks that are to be printed for the first time will be shown in the Print Checks tab and checks that were already printed will be displayed in Reprint Checks tab (this gives the ability to re-print checks when necessary).
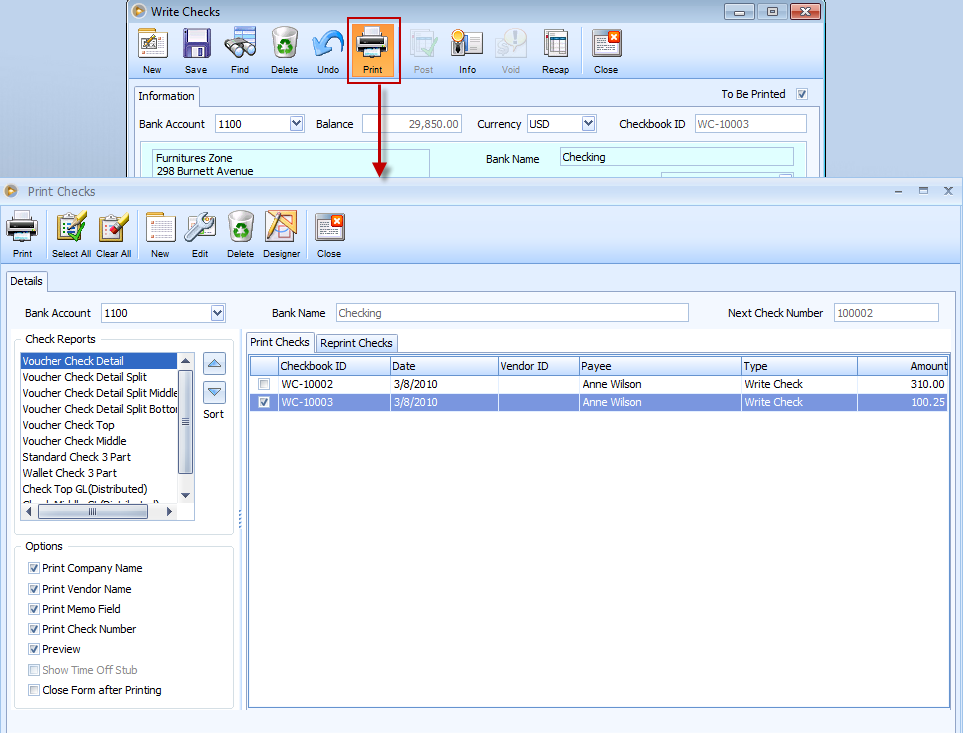
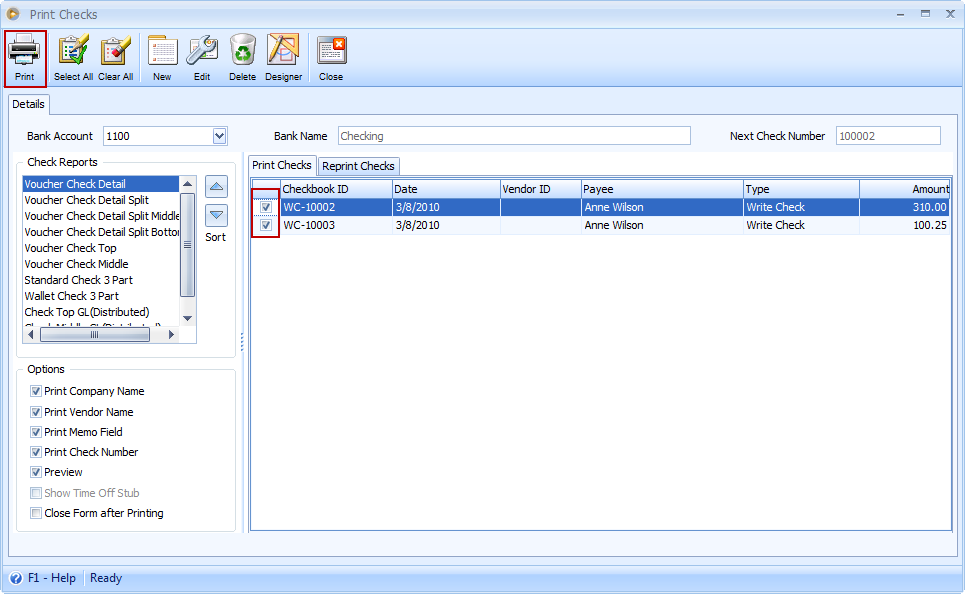
You may print a single or multiple checks at the same time. For multiple check printing, use the checkbox before the Checkbook ID to select checks you want to print and click Print button.
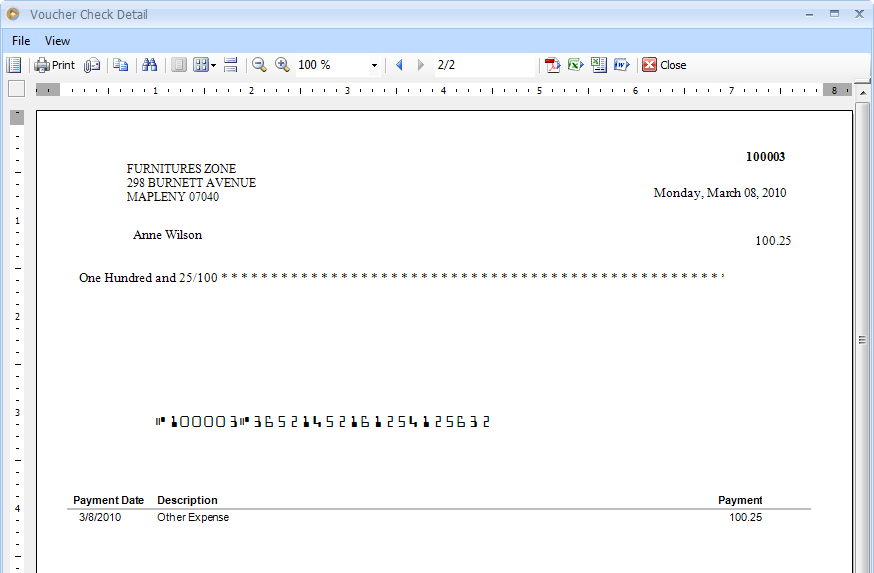
If Preview checkbox is enabled, a preview of these checks will open.
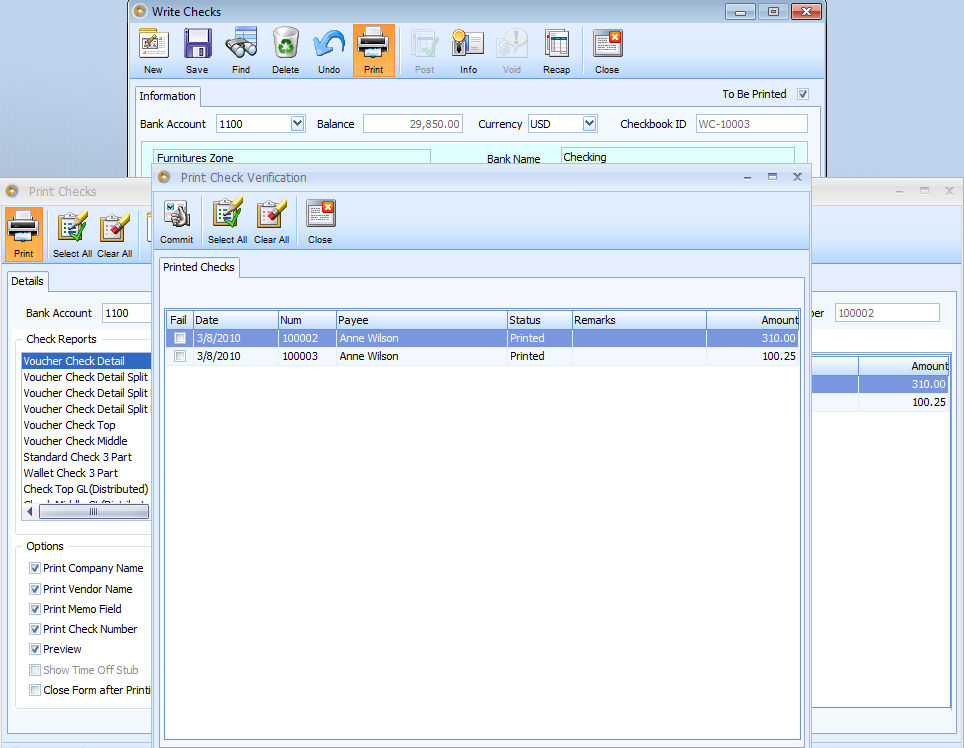
Now, let us assume that checks were already printed. Closing the preview of these checks or in the case were Preview checkbox is disabled, right after the checks are actually printed, the Print Check Verification form will open. This form will display all the selected checks from the Print Check form. It will show you the check numbers that were assigned as checks were printed. If all the checks were printed properly, you may proceed with committing these checks by clicking the Commit button. This will then automatically post these checks to the General Ledger and update all selected transactions with the appropriate check number that was assigned during printing.
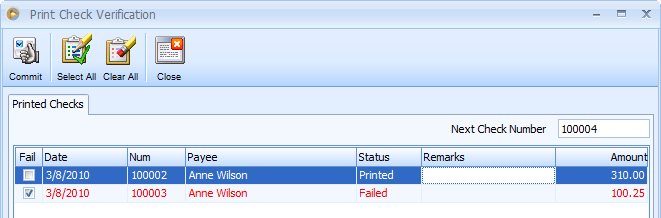
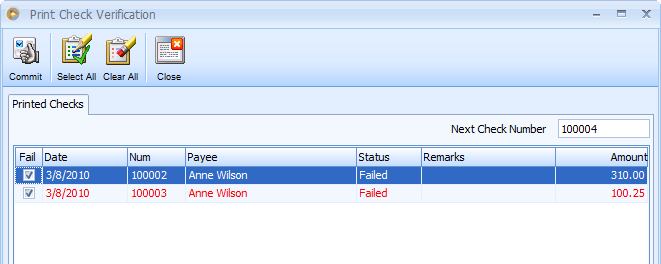
In situations where check/s did not print properly, use the Fail checkbox for each of the checks that did not print properly. When you select the Fail checkbox, the Status will automatically change to display ‘Failed’ and the entire line item will show in red. Below is a sample of a check that is marked as failed.
Another situation:
If the check that failed to print or that is set to be ‘Failed’ has succeeding checks, like the one below, this message will be shown.
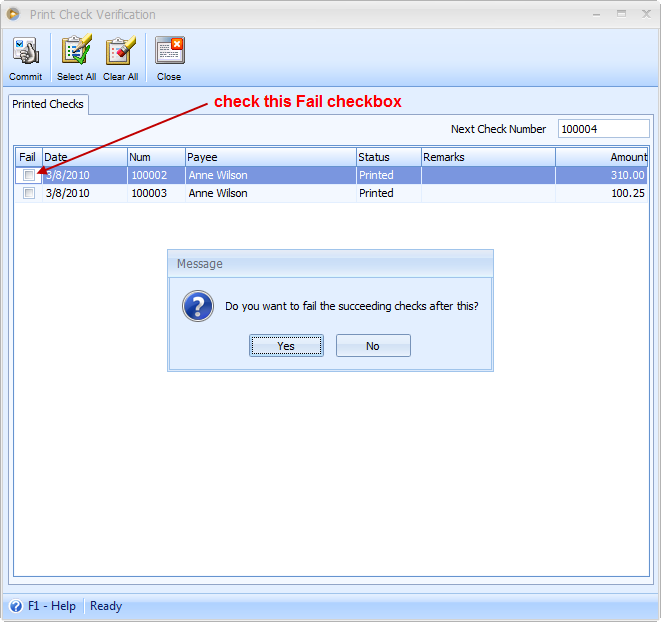
Clicking YES will mark the succeeding check/s as ‘Failed’.
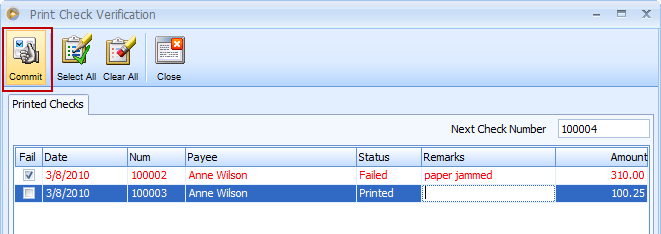
Let’s continue on with selecting only check no. 100002 as Failed. Now click the Commit button.
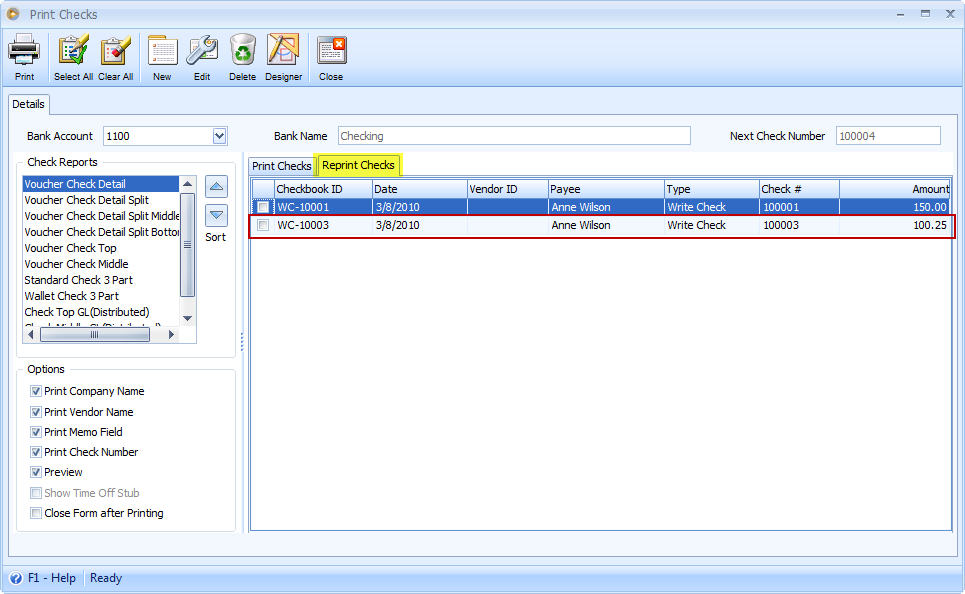
You will be back to the Print Checks form. Notice that the check that was set as ‘Failed’ is still in Print Checks tab.
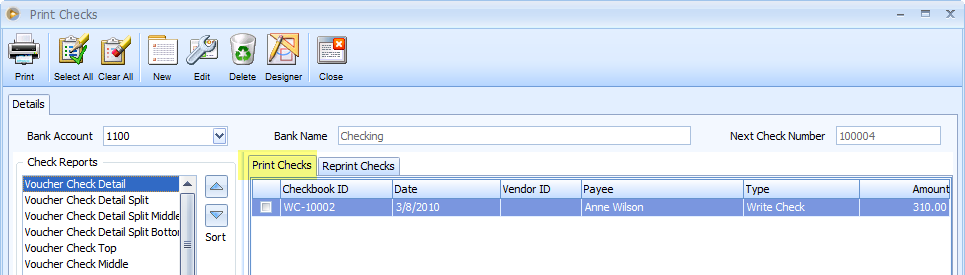
And the check that was successfully printed is now displayed in the Reprint Checks tab.
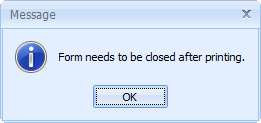
Closing the Print Checks form will show this message. Click OK and the Write Check form will be closed.
Going back to the Bank Account Information form, click the Check Audit button to check the check number listing. In here, you will be able to see an audit of your Check Numbers.
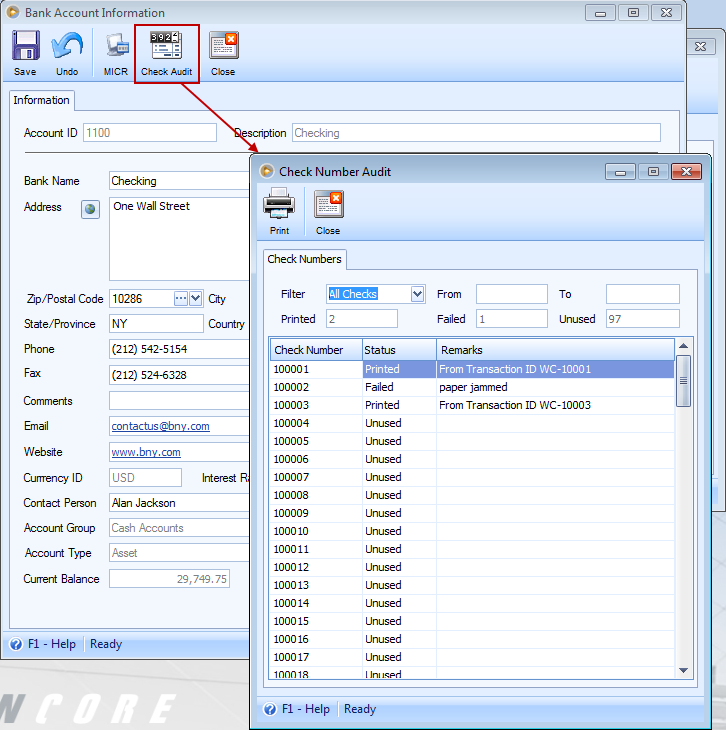
Only check/s that was successfully printed gets posted to the General Ledger.
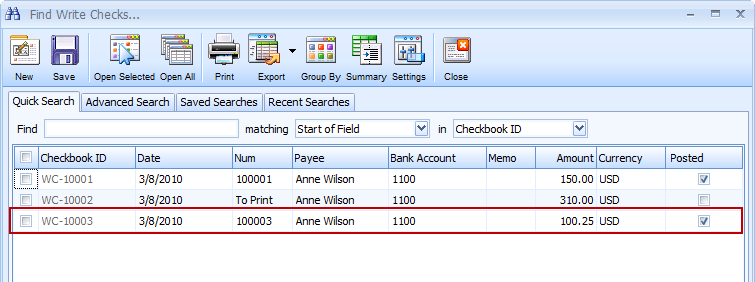
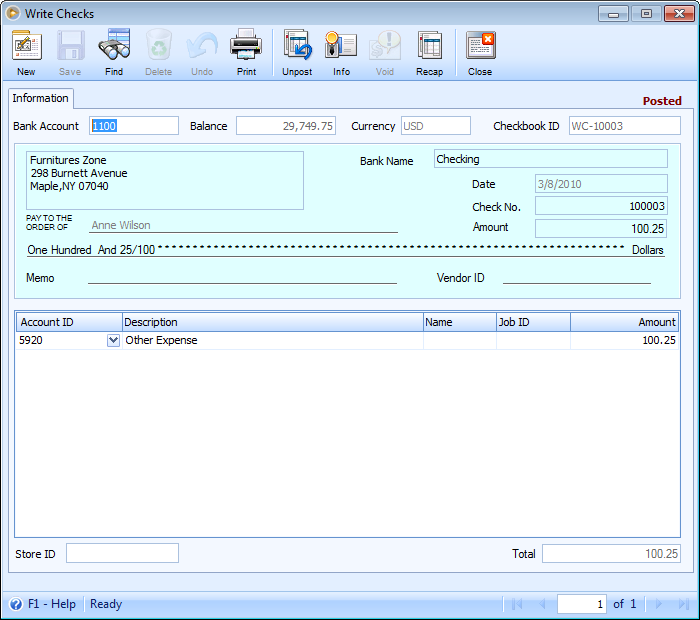
And those that were not successfully posted remain as still ‘To be Printed’ with the check number field showing as 'To Print'.
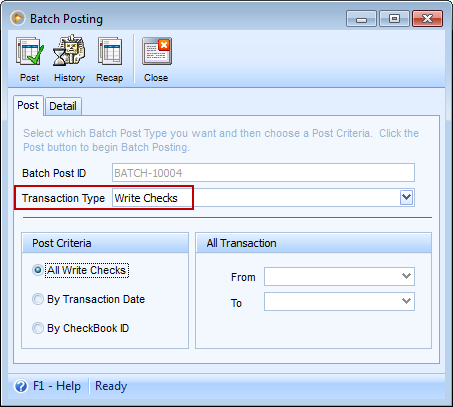
Impact of the new implementation on Batch Posting
In Batch Posting, Write Checks, Payables, Paychecks and Vendor Prepayments transaction types will NOT show transactions with Check No. = To Print.
Example: Write Check > WC-10002 is created using the To be Printed implementation (Num = To Print) and is not yet posted.
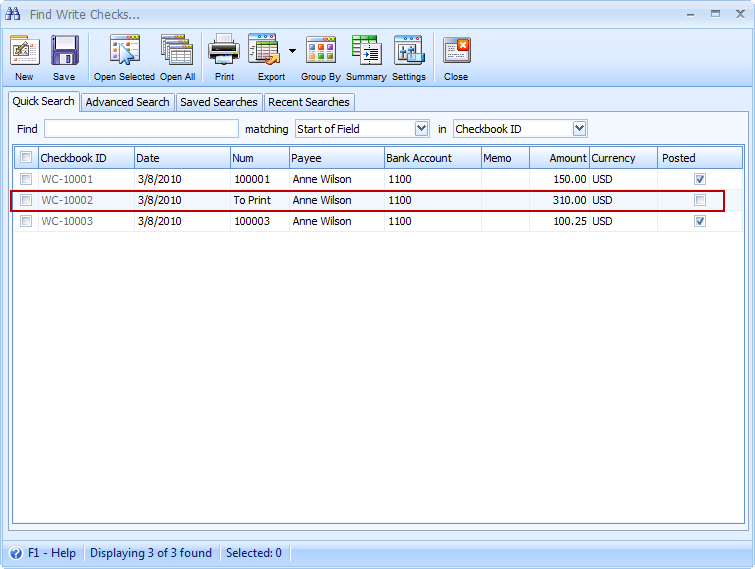
When you open the Batch Posting form and select Write Checks in the Transaction Type, WC-10017 will not be shown here because before you can post a check transaction using the new check implementation, the said check transaction must be printed first.

What happens when the check is unposted?
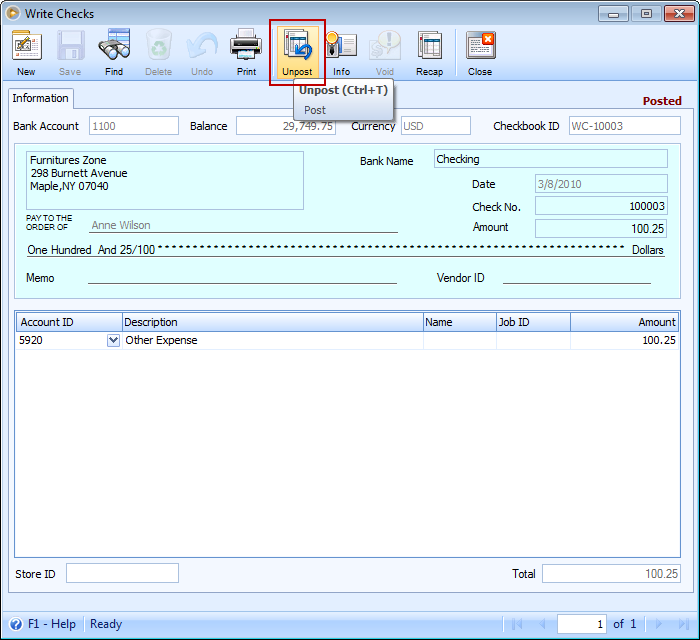
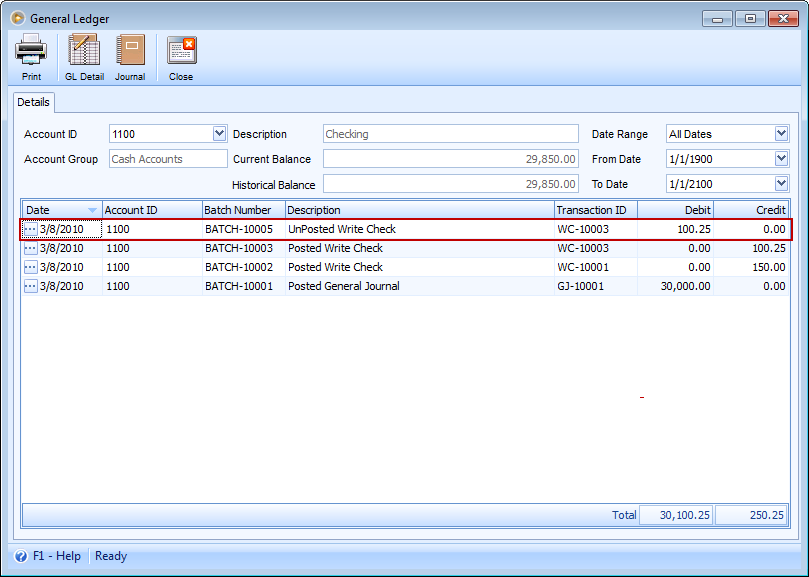
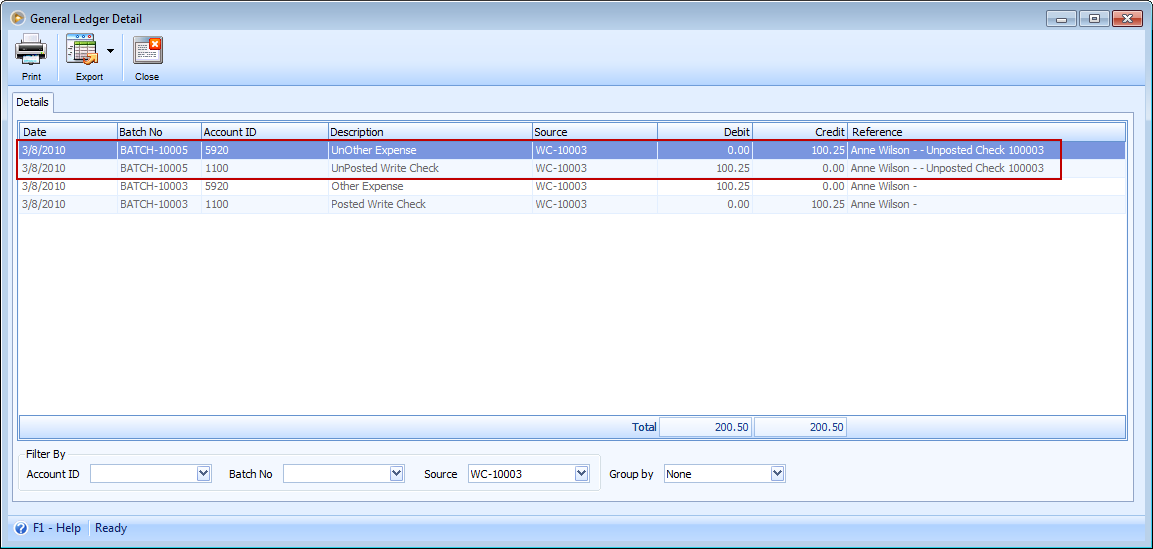
GL Impact: Unposting the check will reverse the original entry.
Form Impact: Check No. will stay as is and the same check transaction will be shown in the Print Checks tab.
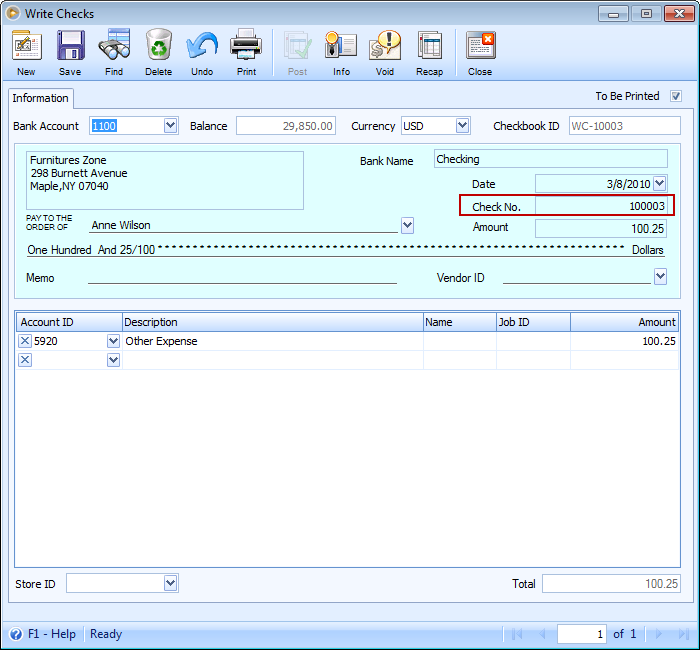

And if you Commit that check transaction, then it will again get posted.
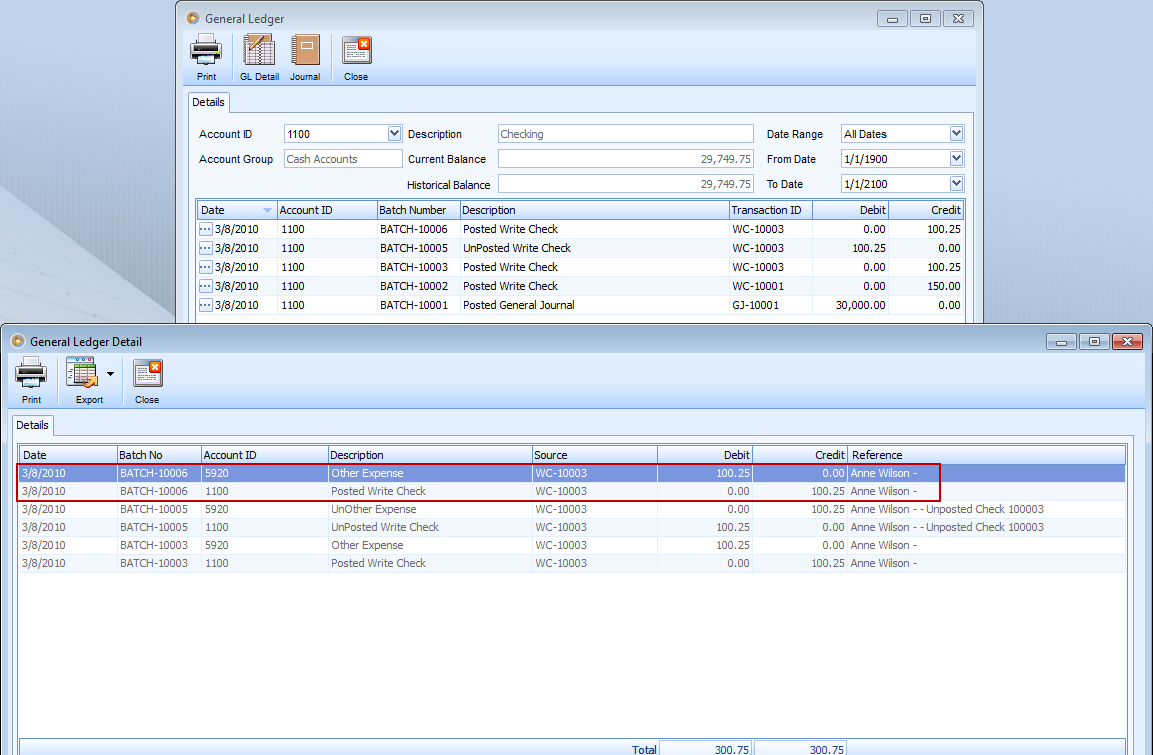
Here are the GL entries when the check transaction is posted.