AP Clearing
This is how Enable AP Clearing works.
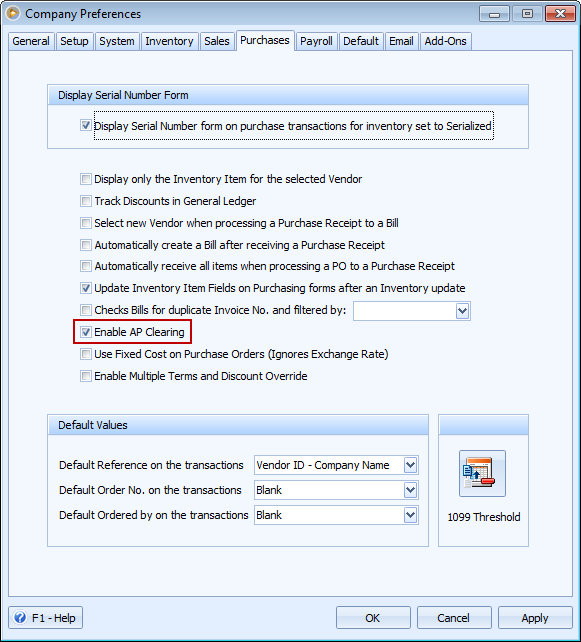
Make sure that Default Account for AP Clearing is filled up so that when creating PO or PR, that same account ID will be used by default. This is to prevent you from selecting an AP Clearing account every time you Create PO or PR.

When Enable AP Clearing is enabled, the following changes in PO, PR and Bill will take place.
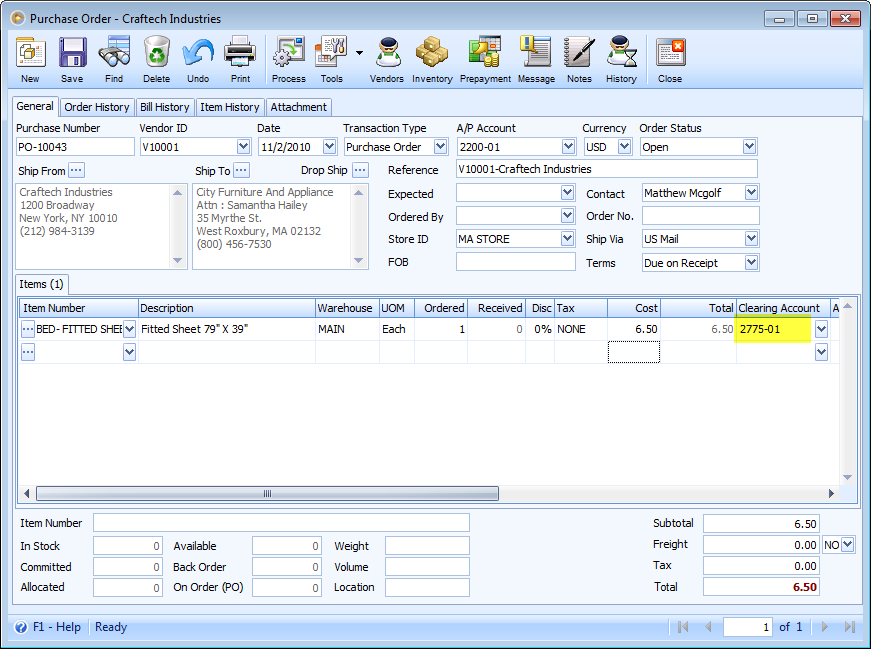
Purchase Order, Purchase Receipt and Bill
As you select an item, the default account set for AP Clearing will automatically be shown in Clearing Account field.
Purchase Receipt
There will be a Recap button where you can view the entry to record the stock/inventory item to be received and is to be posted against a temporary AP account, which in this illustration we will call as Intermediary AP Clearing account.
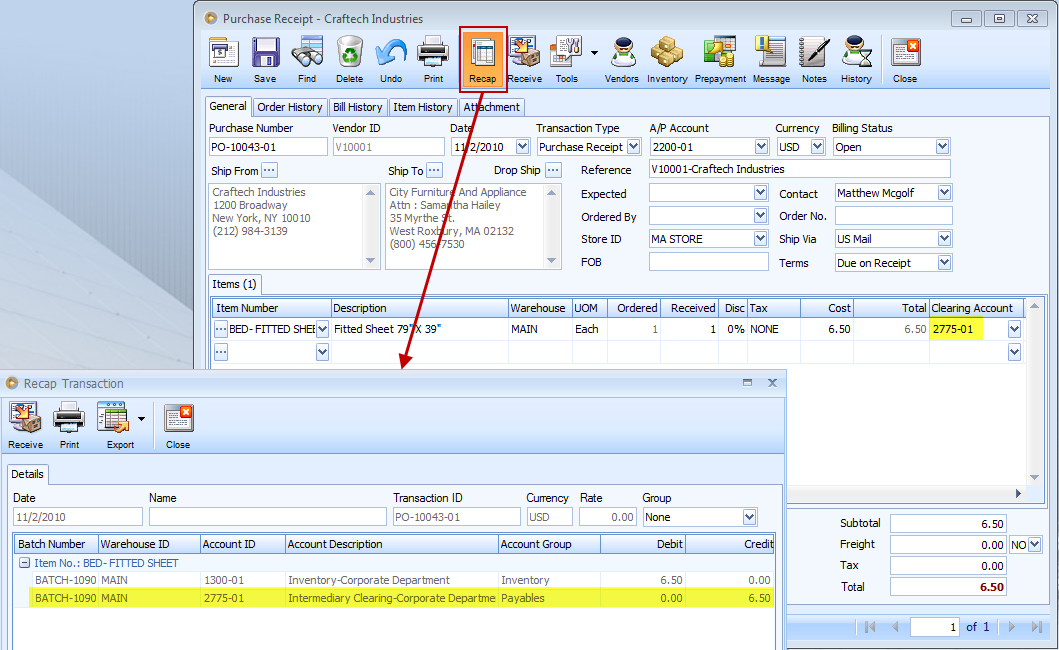
You can either click the Receive button on the Purchase Receipt form or from the Recap Transaction form to receive the items and at the same time impact the General Ledger for the item received. The entry would be a debit to the Inventory Account and a credit for Intermediary AP clearing account.
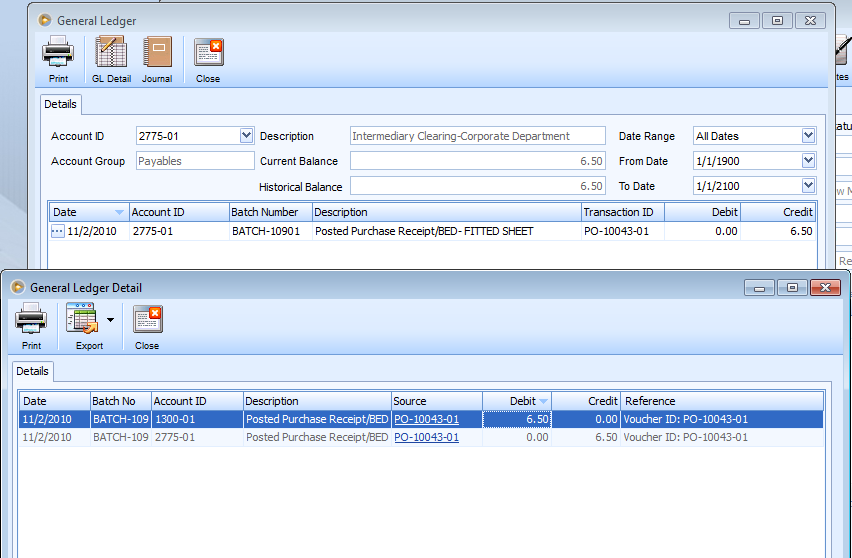
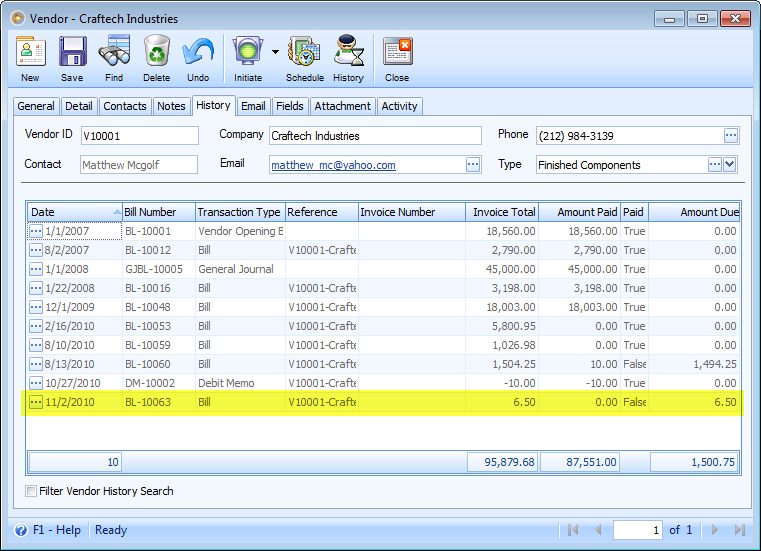
Notice that after receiving the item, there is no record yet of this kind in the Vendor form –History tab, which simply means that Vendor’s balance is not yet affected by the mere receiving of the item.
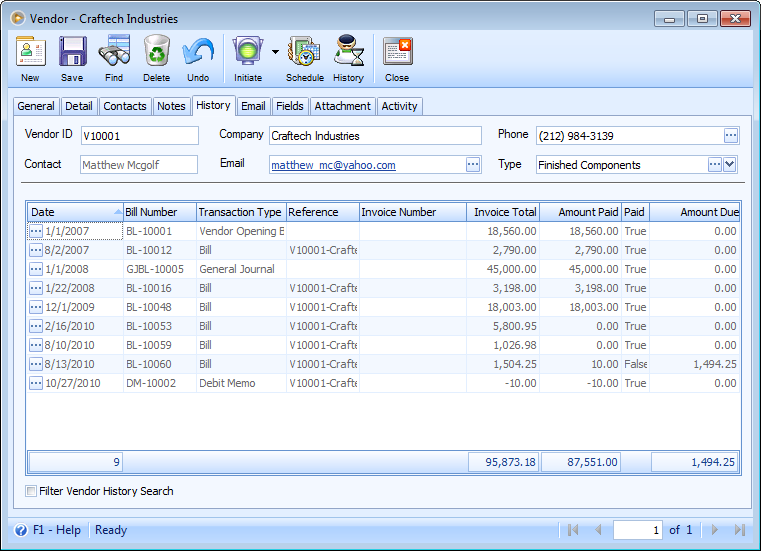
When the Purchase Receipt is processed to Bill and the Bill is posted, it is during this time that the Intermediary AP Clearing account is zeroed and real AP account is impacted. Also, it is in this time that Vendor account is updated.
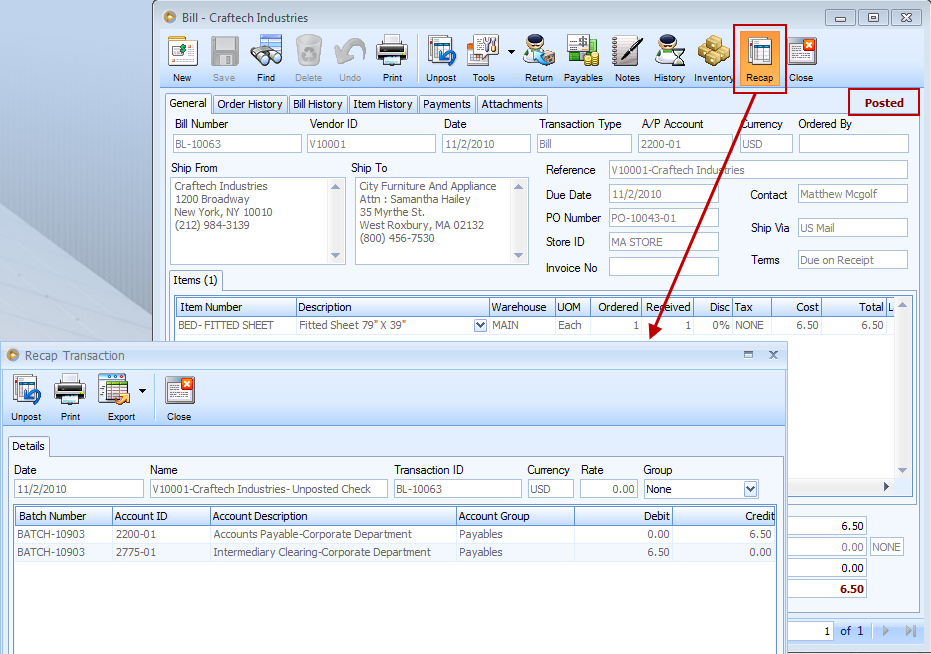
Notice that after posting the bill, there is already a record of this kind in the Vendor form –History tab, which simply means that Vendor’s balance is now affected/increased.