|
Creating Custom Report and Sub Report
A. Creating Custom Report
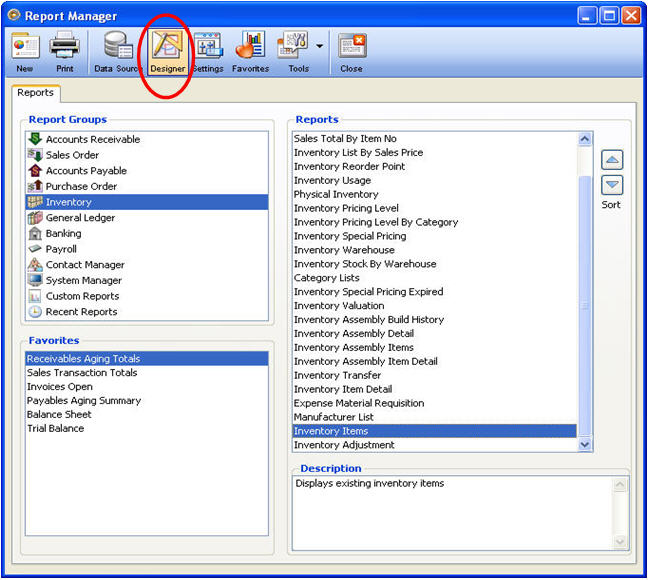
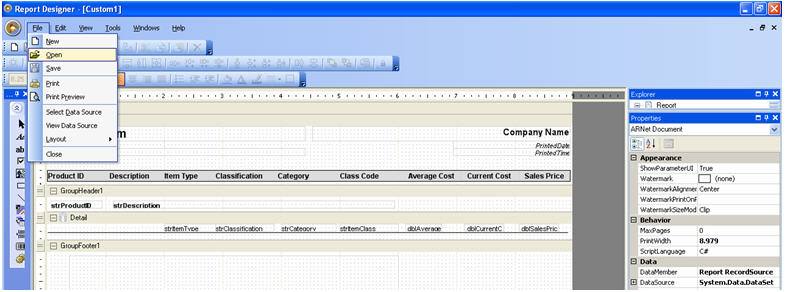
1. Choose the Report Name that you like to customize. Click on the Designer button
Sample:
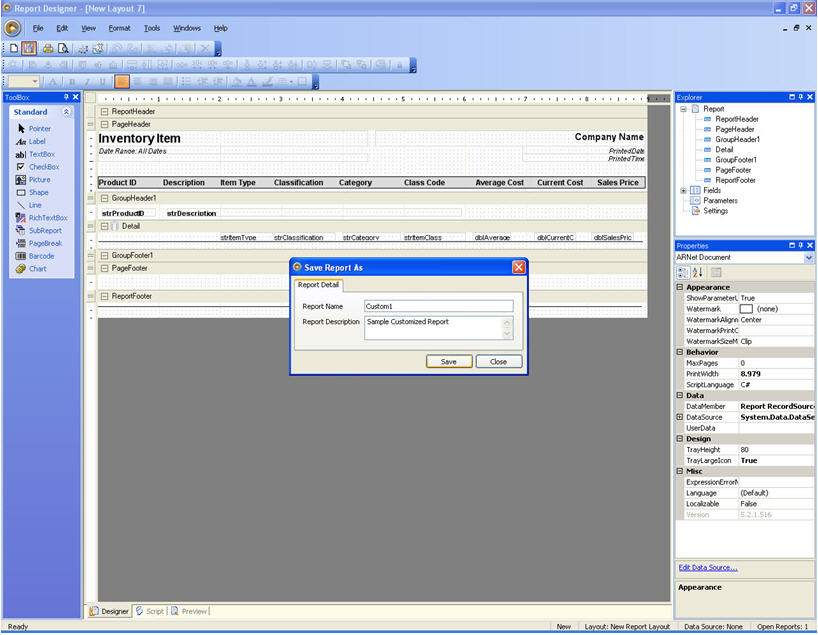
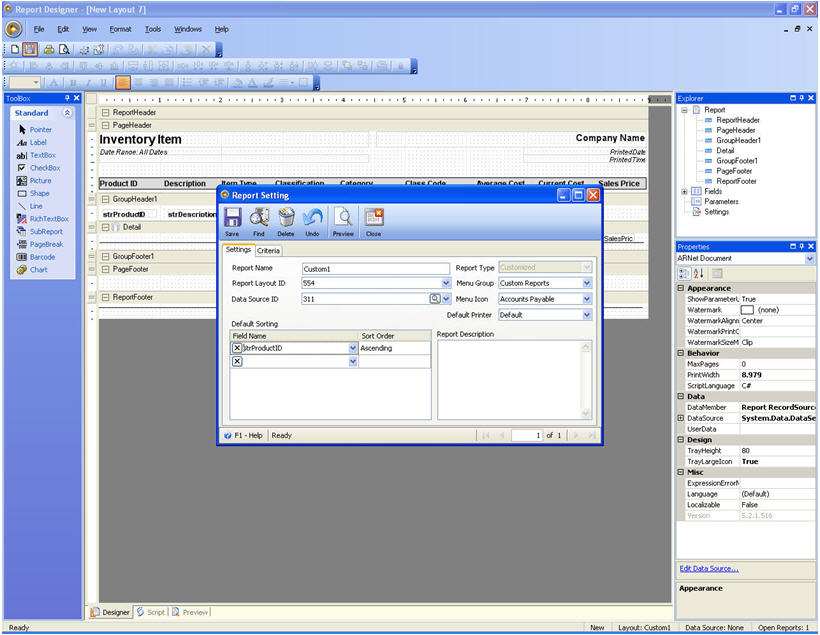
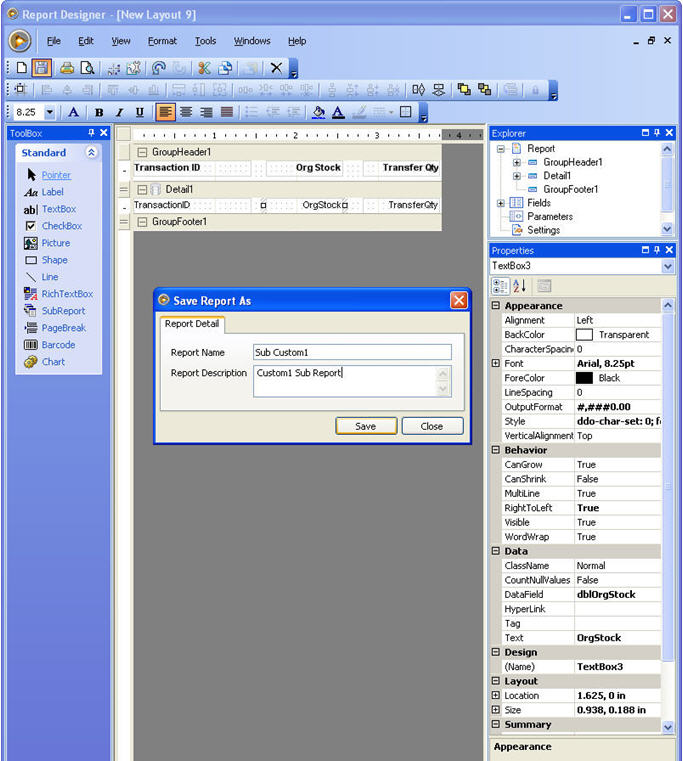
2. Save the Report Layout and Report Settings to your desired Layout Name
Sample:
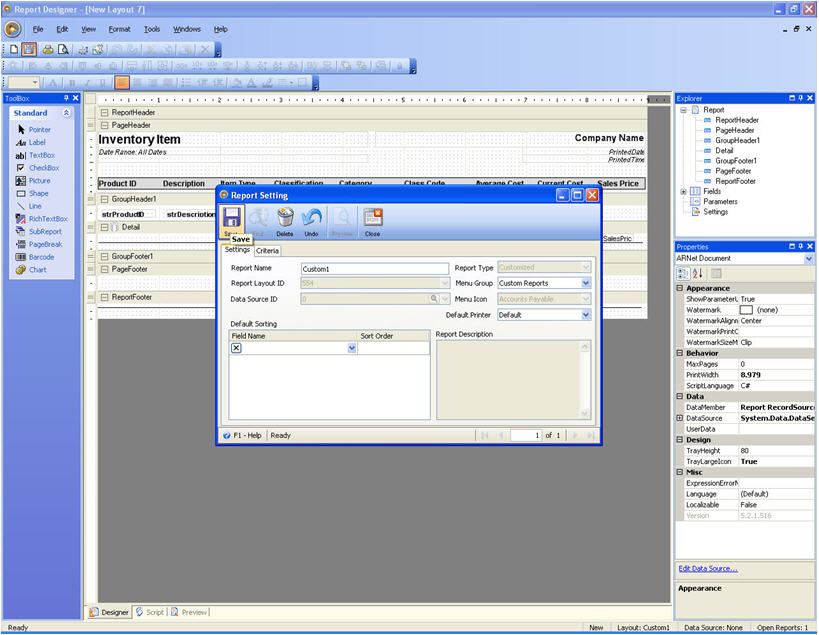
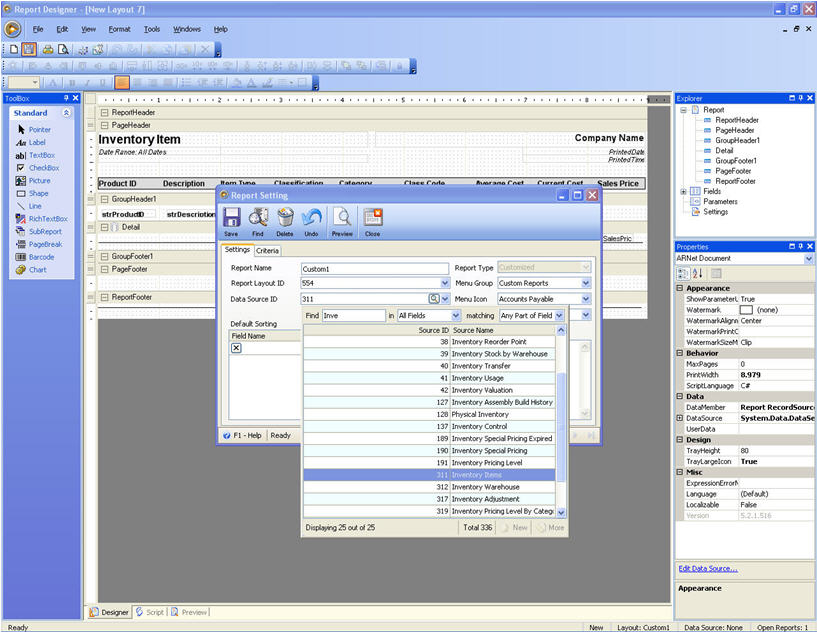
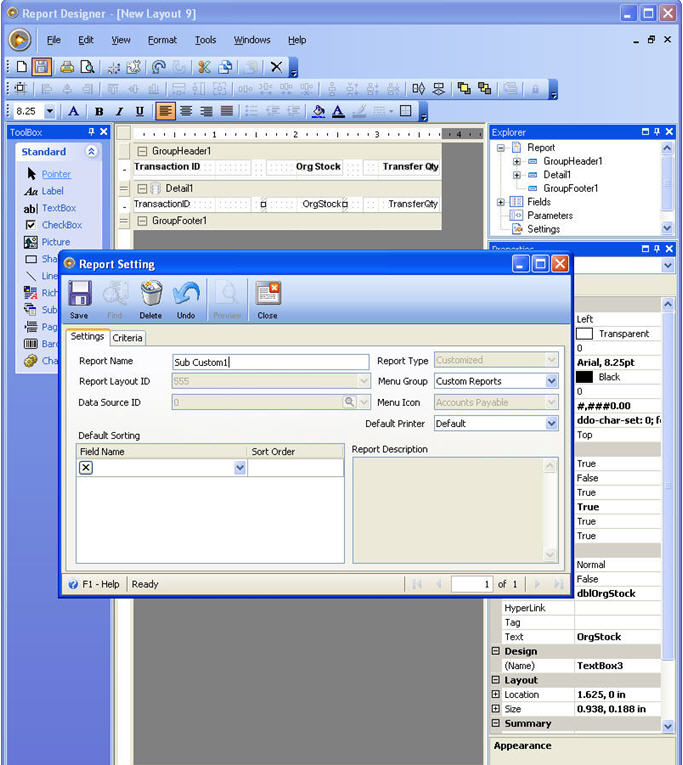
3. Choose the DataSource ID for your Custom Report.
4. Set the desired setting of your Custom Report. Click the Save button and Close the Report Setting form.
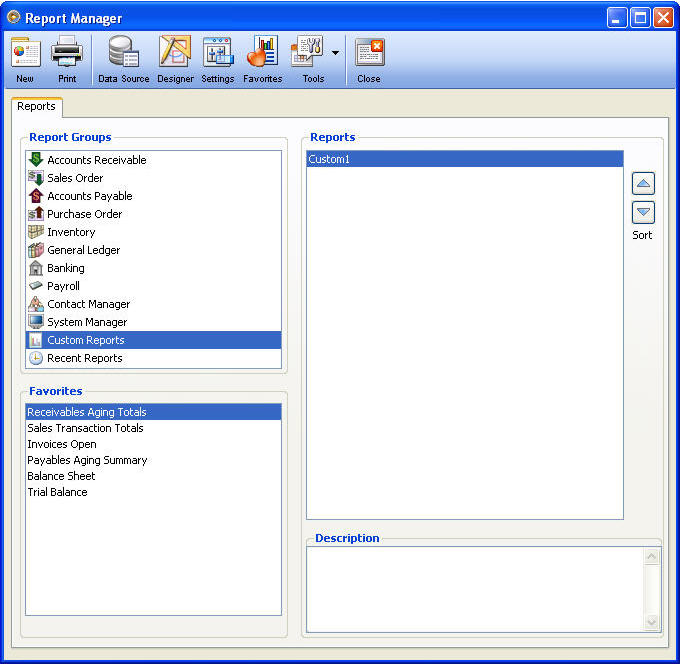
5. Close the designer and your Custom Report in the Report Manager under the Custom Reports Group
B. Creating Sub Report
1. Open the Designer of your Custom Report. Then click on New button or click on New from the File Menu.
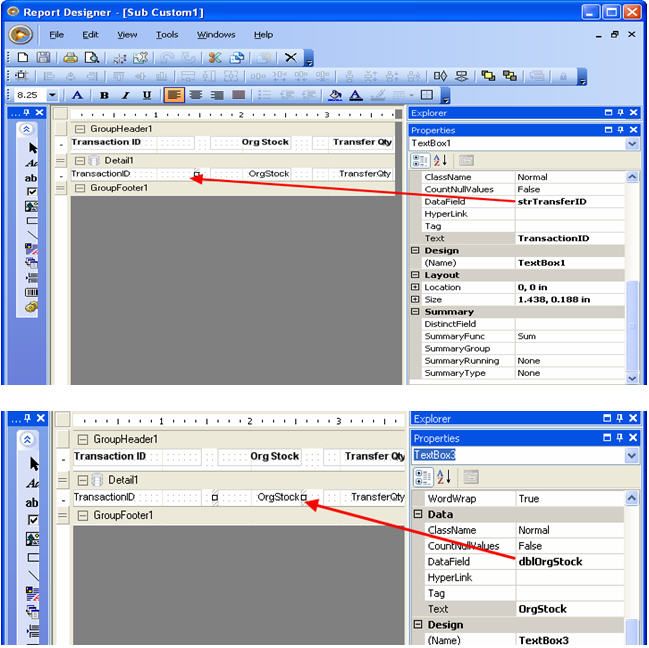
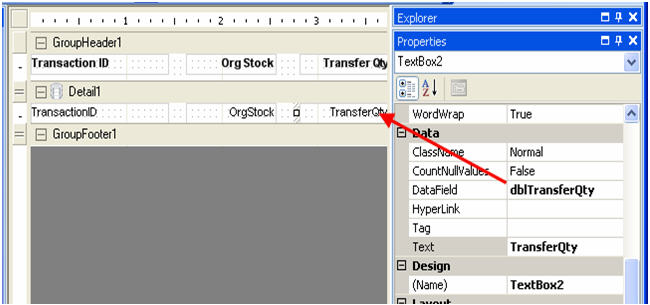
2. Create your desired layout.
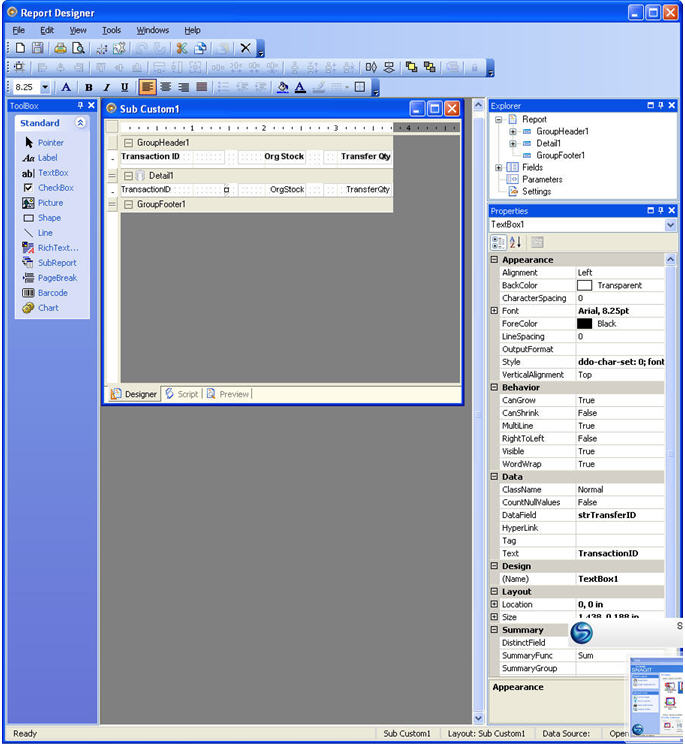
Don’t forget to type in the field name in the textbox.
3. When you’re finished with your Sub Report, Click on Save and Save the Report Layout to your desired file name.
4. Save your Desired Report Settings.
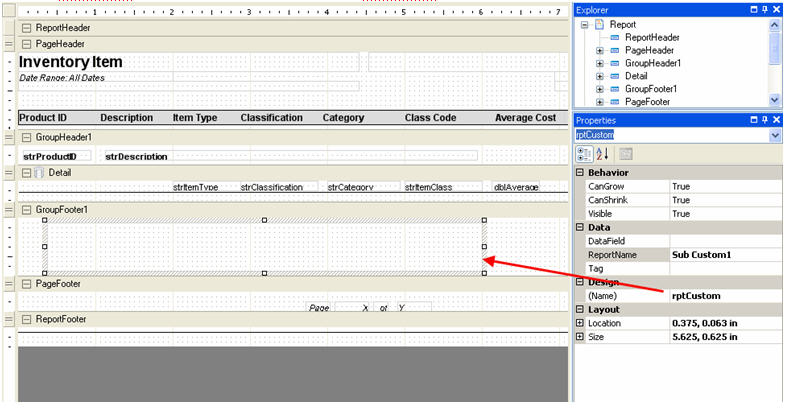
C. Adding SubReport to the Customized Report
1. Go back to the Designer of your Customized Report.
2. Click SubReport from the ToolBox
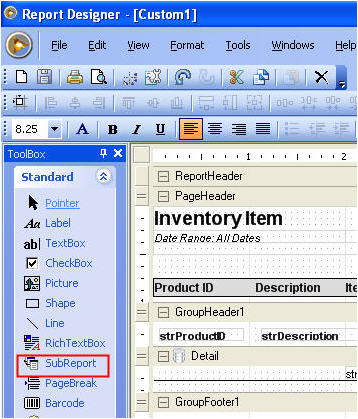
3. Drag the SubReport to the Report Layout. Make sure that the size of the SubReport tool is large enough to fill in the size of your Sub Report.
4. In the Properties Window change the ReportName field to the Report Name of your Sub Report.
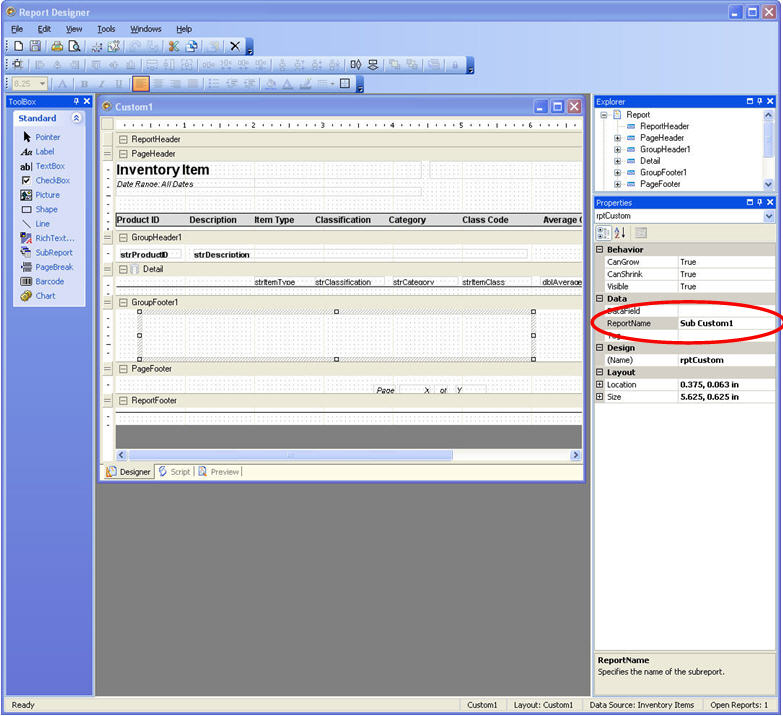
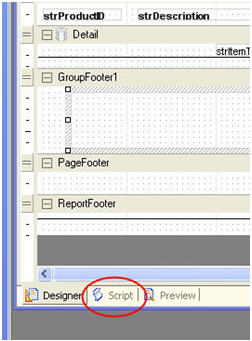
5. Click on the Script tab of the Report Layout.
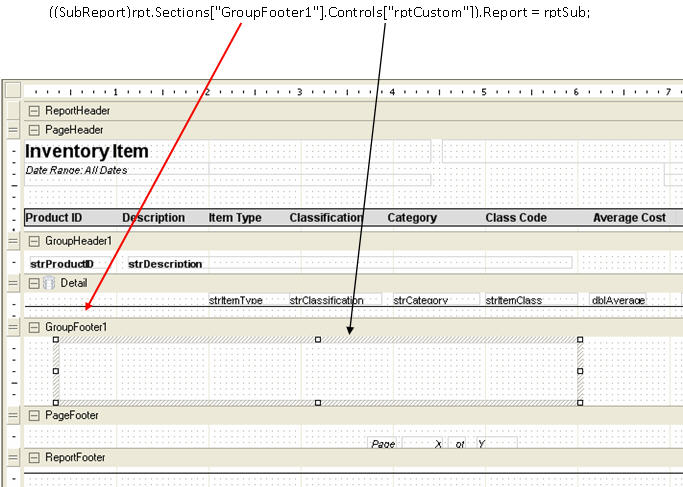
6. Create a script that will fill in the data you needed for your Sub Report.
Sample:
Editing Sub Report
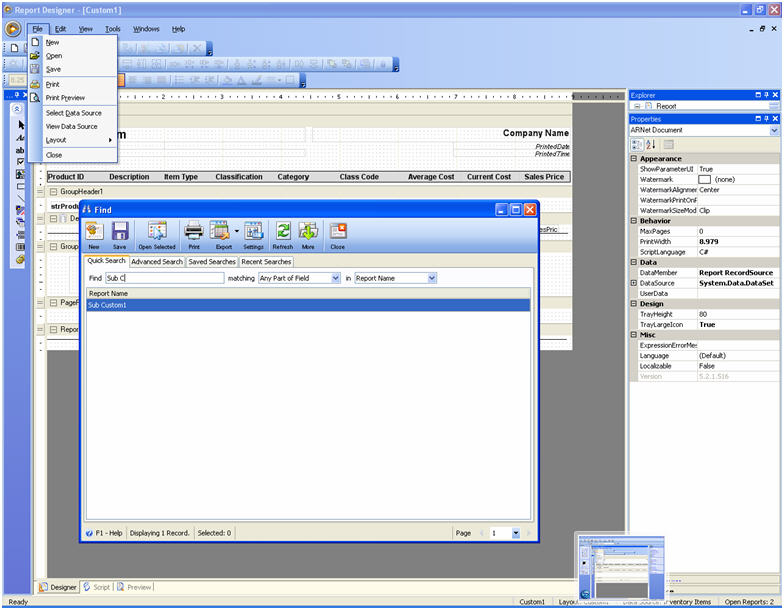
1. Click on Open from the File menu of the Designer.
2. Select the file name of your Sub Report.
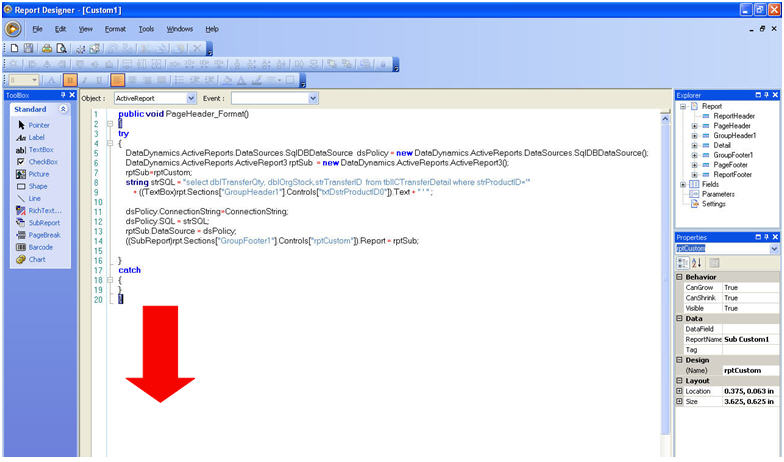
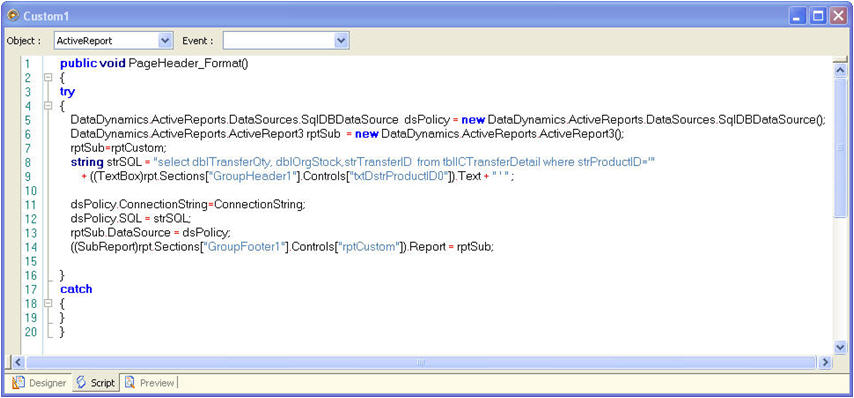
Creating Script for the Customized Report
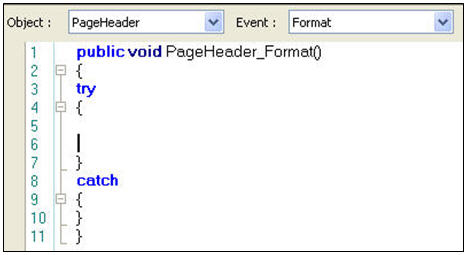
1. In the Object dropdown, select PageHeader and Format in the Event Dropdown.

2. The Script will look like this:

This is the event that will fire the script.
3. After the opening bracket. Place this line of code. This code is used for exception handling.
try
{
}
catch
{
}
The script will then look like this:
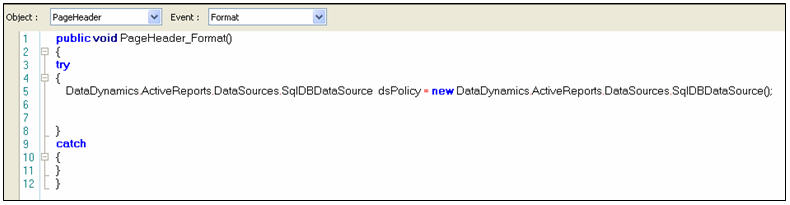
4. Add this line of code in the 5th line of your code. This will represents a report data source

The script will now look like this.
5. On the 6th line is this code. This line will be used to execute and render the report.
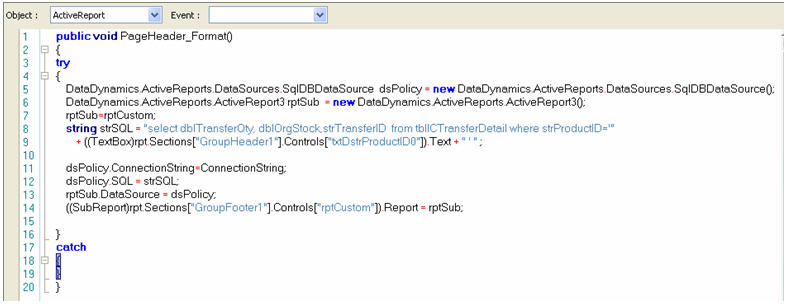
DataDynamics.ActiveReports.ActiveReport3 rptSub = new DataDynamics.ActiveReports.ActiveReport3();
6. On the next line is this code:
rptSub=rptCustom;
This is used for assigning a Subreport to the datasource
rptCustom à Is the name of the SubReport control in the Report Layout
7. Add your SQL Query in the next line.
Sample:
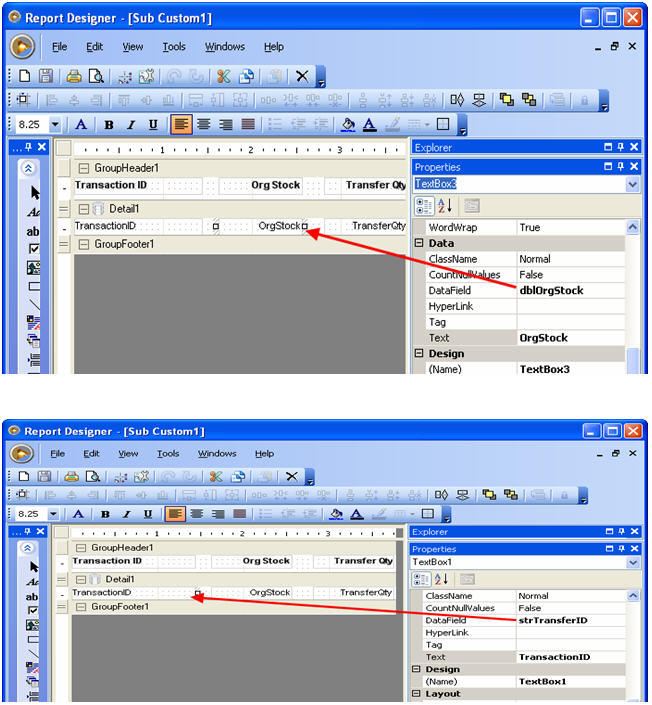
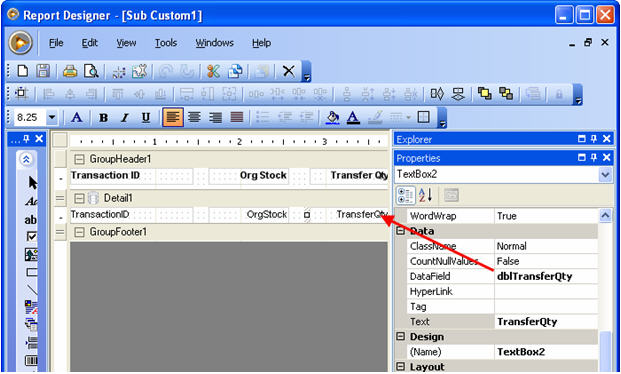
string strSQL = "select dblTransferQty, dblOrgStock,strTransferID from tblICTransferDetail where strProductID='"
+ ((TextBox)rpt.Sections["GroupHeader1"].Controls["txtDstrProductID0"]).Text + " ' " ;
Note:
string strSQL à is the variable where you will pass the SQL Query of your Sub Report.
Sample SQL Query:
"select dblTransferQty, dblOrgStock,strTransferID from tblICTransferDetail where strProductID='"
+ ((TextBox)rpt.Sections["GroupHeader1"].Controls["txtDstrProductID0"]).Text + " ' " ;
dblTransferQty, dblOrgStock,strTransferID à Fieldnames from the table in a database.
tblICTransferDetail à Tablename
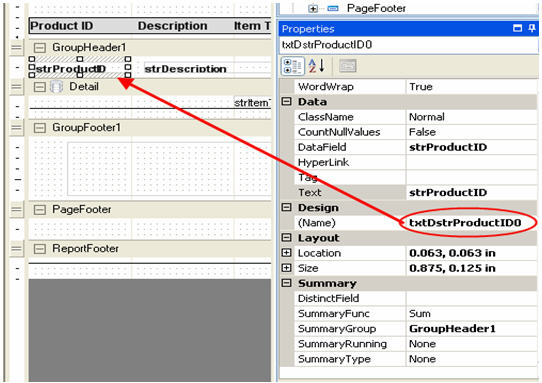
((TextBox)rpt.Sections["GroupHeader1"].Controls["txtDstrProductID0"]).Text à This control holds the data for filtering
GroupHeader1 = Report Section that holds the data of Product ID
txtDstrProductID0 = Control Name that holds the Product ID.
8. Next are the following line of codes:
dsPolicy.ConnectionString=ConnectionString;
dsPolicy.SQL = strSQL;
rptSub.DataSource = dsPolicy;
dsPolicy – the datasource that we declared in Step 4.
rptSub – the Report that we declared in Step 5.
dsPolicy.ConnectionString=ConnectionString; à This will set the connection to the database.
dsPolicy.SQL = strSQL; à This will execute the SQL command.
rptSub.DataSource = dsPolicy; à This will assign the Datasaource of the Sub Report
9. Next is the line of code below:
10. Click the Save button. The code should look like this.
|