|
Installing SQL Server 2005 Express Edition
1) Download the Microsoft .NET Framework 2.0 Redistributable Package. Based on your server processor, select the appropriate version to download. The most common of the 3 choices is to download x86 version. After you’ve downloaded the framework, then install the dotnetfx.exe file on your server using the defaults.
http://msdn.microsoft.com/en-us/netframework/default.aspx
2) Make sure you have the latest Windows Installer 3.1 installed on your server. This is required to install all editions of SQL Server 2005. If you do not have it you can download it using the link below.
http://support.microsoft.com/kb/893803
3) Download SQL Server 2005 Express Edition from Microsoft’s web site using the link below. Select the SQL Server 2005 Express Edition with Advanced Services (234MB) which includes SQL Server Management Studio Express, a graphical management tool based on SQL Server Management Studio that makes it easy to manage and administer SQL Server Express databases.
http://www.microsoft.com/express/sql/download/default.aspx
4) Run the file SQLEXPR_ADV.EXE and follow the steps below to configure it to work properly with VisionCore.
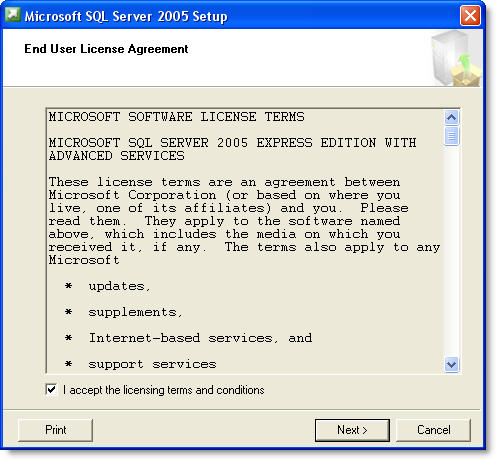
5) Accept the License Agreement and click Next
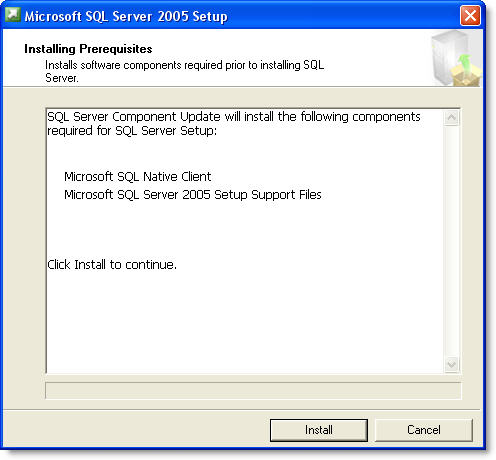
6) Click Install to install the prerequisites
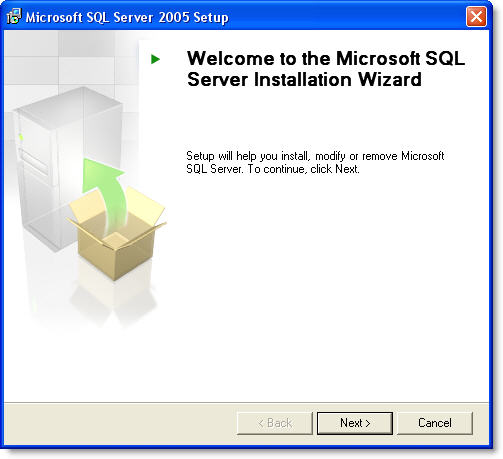
7) Click Next to start installing SQL Server 2005
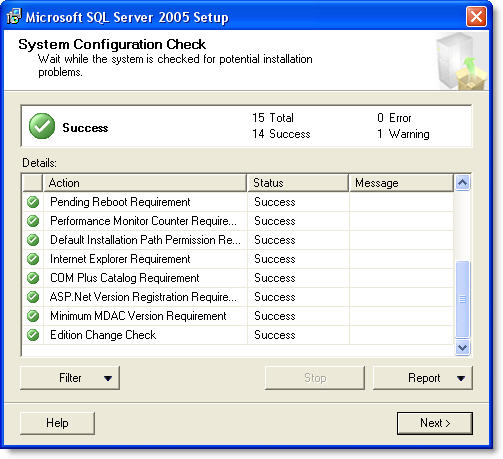
8) After the System Configuration Check completes click the Next button
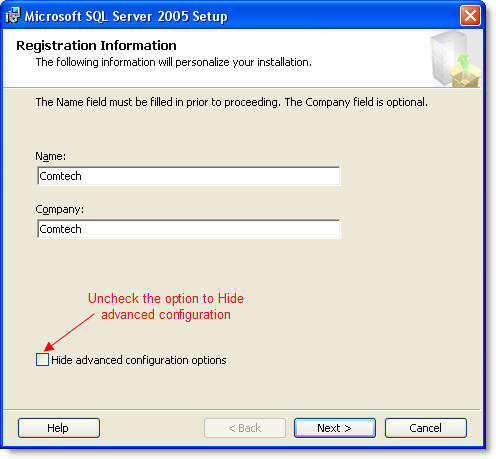
9) Enter your name and Company and deselect the Hide advanced configuration options, then click Next to continue.
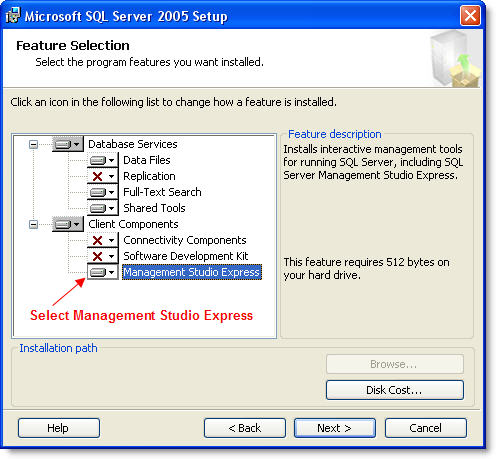
10) In the Feature Selection Enable the Management Studio Express option and click Next
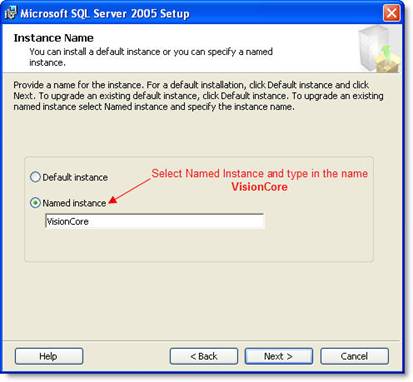
11) Select Named Instance and type in the name VisionCore as your unique instance. You can enter any name you wish here but you should give it a name that you will remember and corresponds to VisionCore.
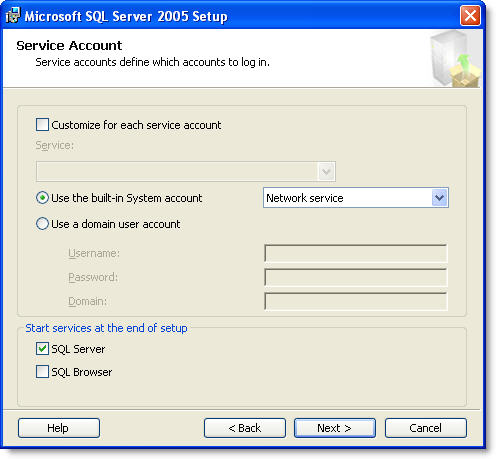
12) Leave the default options in the Service Account form and click Next
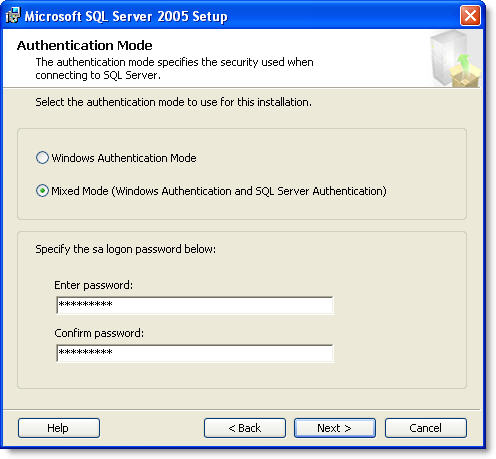
13) Select Mixed Mode and enter a unique Password for the sa (System Administrator) account
14) Leave the default options and click the Next button to continue.
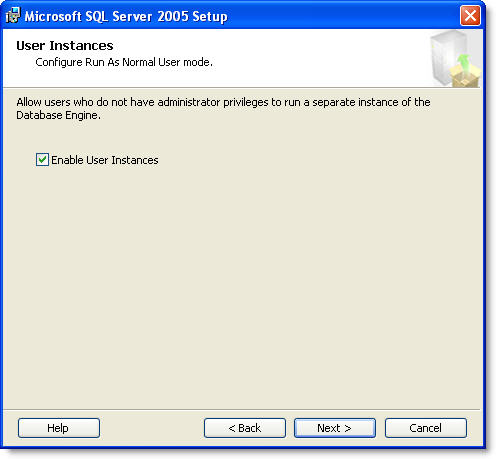
15) Select Enable User Instances and click Next
16) Leave the default options and click Next to continue
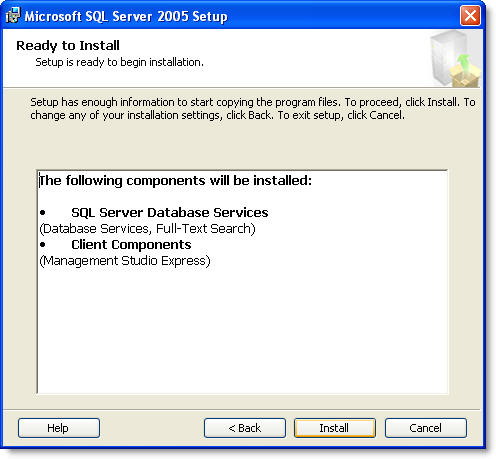
17) Click Install to begin installing SQL Server 2005 Express Edition
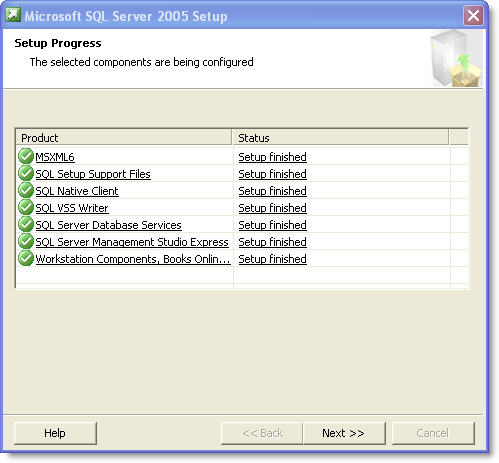
18) After all the components have been installed click Next to continue
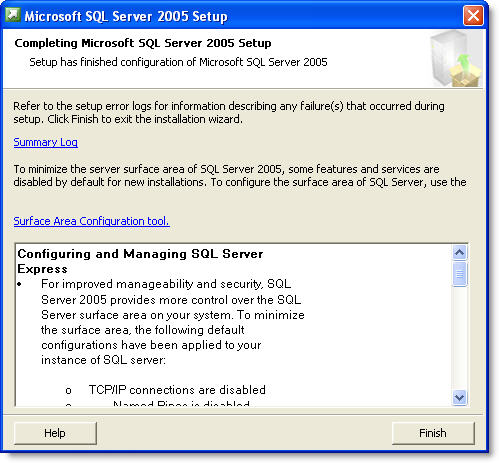
19) Click Finish to complete the installation
20) This completes the installation of SQL Server 2005 Express Edition. Next you need to enable a couple of settings to allow SQL Server 2005 to work over your network.
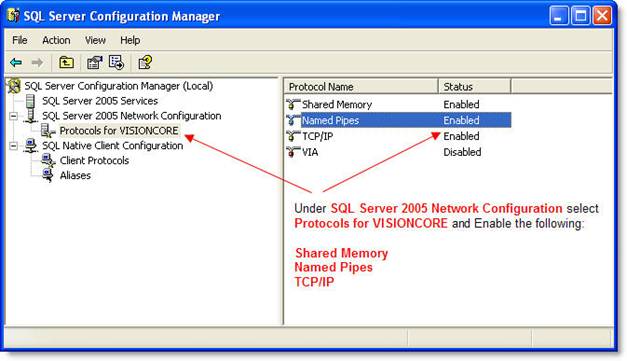
21) From the Start menu select Microsoft SQL Server 2005 | Configuration Tools | SQL Server Configuration Manager.

22) Under SQL Server 2005 Network Configuration select Protocols for VISIONCORE and Enable the following:
Shared Memory
Named Pipes
TCP/IP
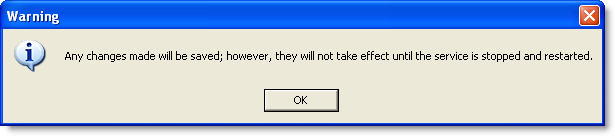
23) You will see a warning message box saying you need to stop and restart the service.
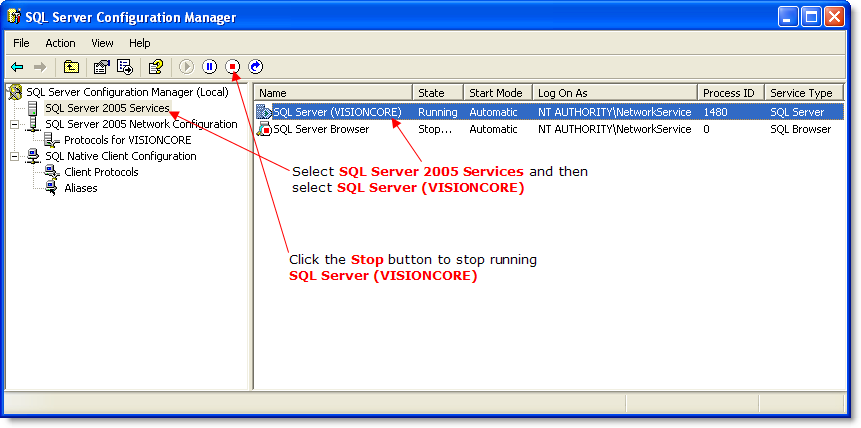
24) To Stop the service select SQL Server 2005 Services and then select SQL Server (VISIONCORE). Then click the Stop button to stop running SQL Server (VISIONCORE).
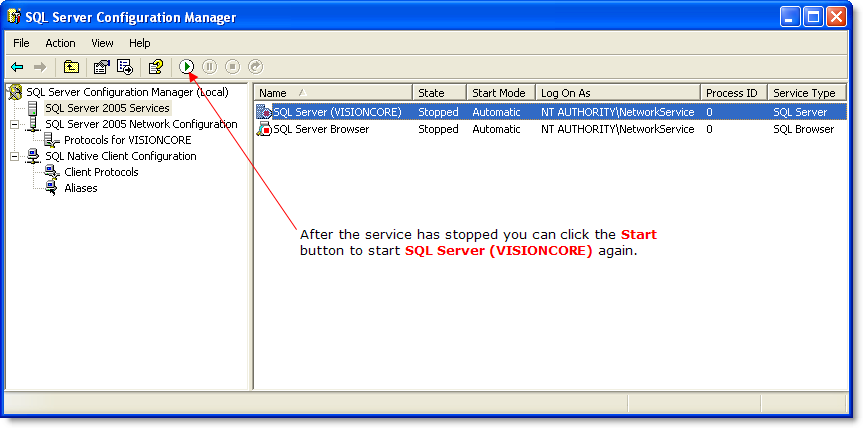
25) After the service has stopped you can click the Start button to start SQL Server (VISIONCORE) again.
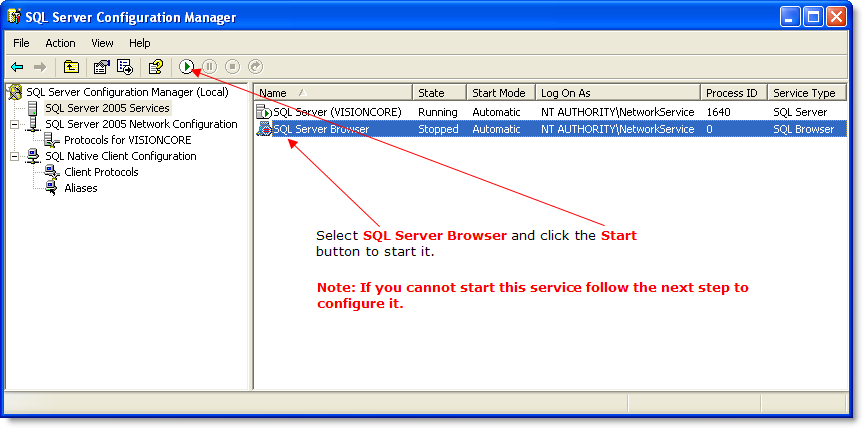
26) Select SQL Server Browser and click the Start button. If you cannot start the browser from here follow the next few steps.
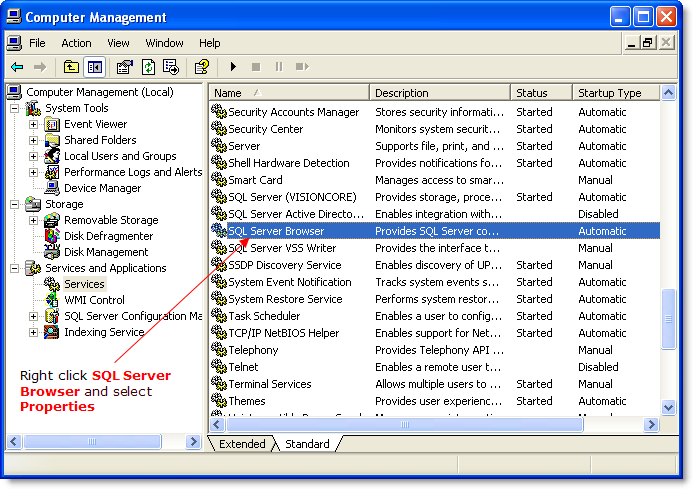
27) On the Start menu, right-click My Computer, and then click Manage. In Computer Management, expand Services and Applications, and then click Services. Right click on SQL Server Browser and select Properties.
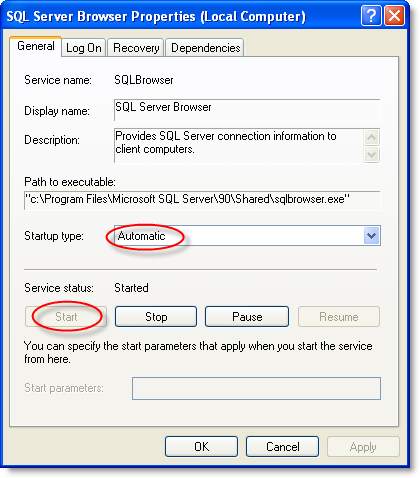
28) In the SQL Server Browser Properties window change Startup Type to Automatic and click the Start button to start the service.
29) Now back in the SQL Server Configuration Manager both the SQL Server (VISIONCORE) and SQL Server Browser should be running.

30) Next make sure your Firewall is configured to allow files to be shared. If you are using the Windows XP built in Firewall open the Windows Control Panel select Windows Firewall and under the Exceptions tab make sure File and Printer Sharing is enabled
Now you should Reboot your server.
|